


As I sat there trying to think of what we could do, I tried to remember what I liked as a kid.. and I remembered making my own little movies. The ones were you use a shoe box and draw your own show that you then roll past the opening, ones just like this.
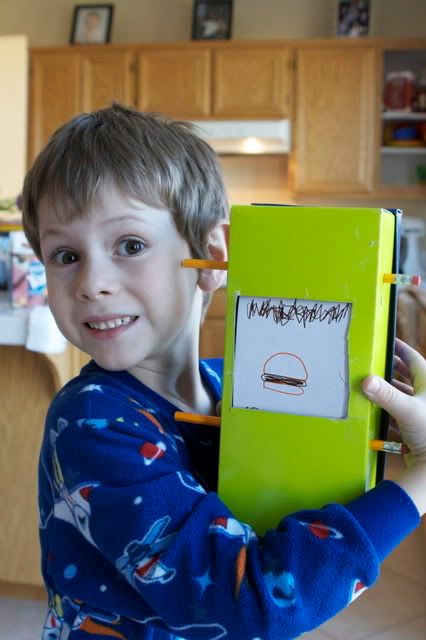 This is my eyes were closed in the last picture so I am compensating look
So how would I turn this into a Time For Tots day? First I found an old strip of film, yes I am talking 35 mm that I happened to have around, and talked about how it was loaded into cameras and the picture would imprint onto it. It is amazing how much digital cameras have changed things; I don't think my kids had any idea what film was.
This led to a discussion about movie projectors and we watched a short video from How Stuff Works on YouTube, you can find it here. The kids loved this video and we watched it many many times. Then we began our work.
I did some of the steps ahead of time, and I should have done a few more; but it turned out a lot of fun.
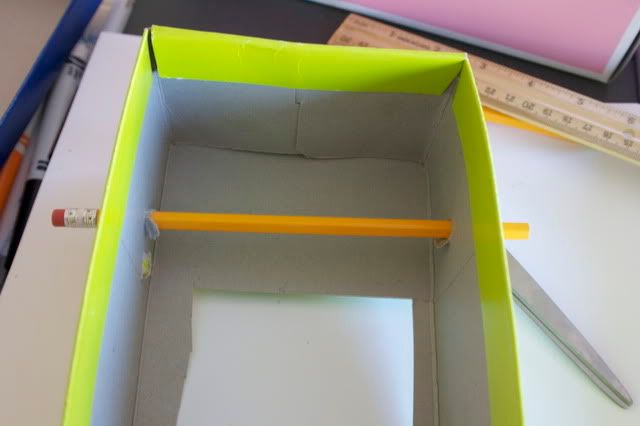
I began with a couple of empty shoe boxes. I turned the boxes upside-down to cut out the screen on the bottom of the box. I used kid size shoe boxes-so the hole/screen was approx 3" X3". I poked a hole in the middle then cut towards my lines and cut out the hole.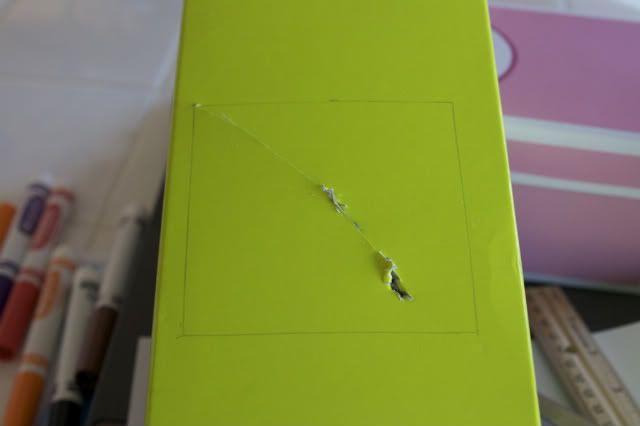 I then measured 3/4" down from the bottom/now top of our box and marked a spot where I wanted to poke the pencil through. I made a small hole with the scissors and then just pushed the pencil through to get the hole the right size. I slid the pencil through until it was pushing on the other side of the box and used that as a guide as to where to poke the next hole (and I also measured). New pencils were the perfect size for these smaller boxes. I made the same holes with a second pencil below the "screen".
 I then cut a bunch of papers into 3" strips and taped them together on the back side to make a really long strand. To help the kids, I drew lines were each screen shot should end so they wouldn't draw the pictures too big.
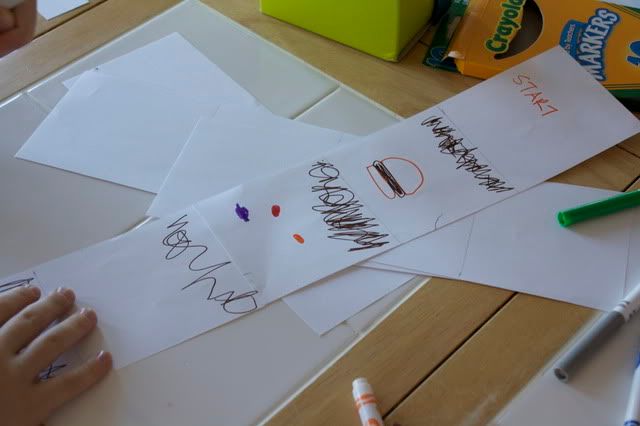
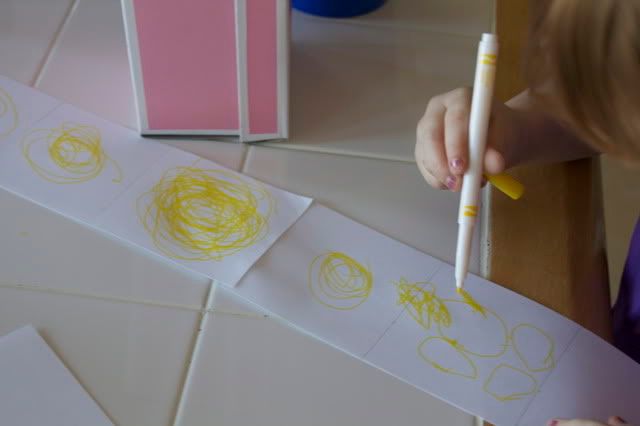
Left: The beginning of Lucas and some blank ones underneath
Right: Alex often draws--today she just scribbled
This led to a discussion about movie projectors and we watched a short video from How Stuff Works on YouTube, you can find it here. The kids loved this video and we watched it many many times. Then we began our work.
I did some of the steps ahead of time, and I should have done a few more; but it turned out a lot of fun.
I began with a couple of empty shoe boxes. I turned the boxes upside-down to cut out the screen on the bottom of the box. I used kid size shoe boxes-so the hole/screen was approx 3" X3". I poked a hole in the middle then cut towards my lines and cut out the hole.
I then measured 3/4" down from the bottom/now top of our box and marked a spot where I wanted to poke the pencil through. I made a small hole with the scissors and then just pushed the pencil through to get the hole the right size. I slid the pencil through until it was pushing on the other side of the box and used that as a guide as to where to poke the next hole (and I also measured). New pencils were the perfect size for these smaller boxes. I made the same holes with a second pencil below the "screen".I then cut a bunch of papers into 3" strips and taped them together on the back side to make a really long strand. To help the kids, I drew lines were each screen shot should end so they wouldn't draw the pictures too big.Left: The beginning of Lucas and some blank ones underneath
Right: Alex often draws--today she just scribbled
***Make sure you have an extra paper at the beginning and end, like with our word Start above, as this will be tapped to the pencil and will never fully show in the screen.
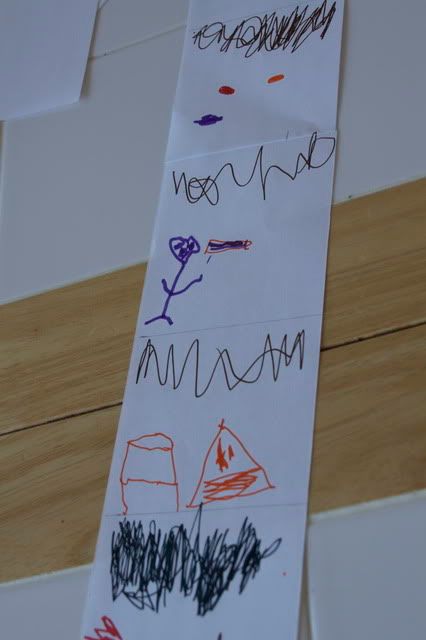
Lucas wanted to tell the Cloudy with a Chance of Meatballs story, the story he will often tell if he is telling a story. He drew all of the clouds and then kept saying, I don't know how to draw you do it. I did draw the hamburger on the first page for him, and then I encouraged him to try again. I even drew on some other pieces of papers some quick ideas of how he could draw things if he didn't know how... but before I knew it, he took over and was doing it on his own.
For Lucas, who is so extremely smart, but often will just not do something if he doesn't know how-due to his anxiety, this was a huge step and I was so proud!
Top-Jelly beans falling from sky
Second- Man eating PB&J that fell from sky
Third- Huge piece of pizza about to crush building next to it
And he made several other pages, which aren't shown
Second- Man eating PB&J that fell from sky
Third- Huge piece of pizza about to crush building next to it
And he made several other pages, which aren't shown
I then taped the starting page to the top pencil. I made sure there was tape all the way across the top of page to help it stay securely on. (make sure your story is facing through the screen) I then wound up most of the story around the top pencil and pulled it so the bottom page reached the bottom pencil and also taped it on. Turn one pencil and it will advance the movie, turn the other and it will rewind it.
I taught the kids how to advance their movies and then we moved over to the couch and the kids took turns telling me their stories while turning the pages of their shows. Alex's scribbles were about a spooky forest with a ghost.
It was so simple, but truly so fun, and both kids still have their "movie projectors" as we call them and will tell me their stories.
It was so simple, but truly so fun, and both kids still have their "movie projectors" as we call them and will tell me their stories.
How fun! I haven't thought of those in years. I remember making one at my grandmother's house. She was always making fun but educational games for us to play.
ReplyDeleteI haven't done one of those for YEARS! Great idea!
ReplyDeleteI can honestly say that I don't think I have ever made one. My kids would go bananas over this.
ReplyDeleteWhat a fun idea! I bet they really enjoyed it!
ReplyDeleteThat is a fabulous craft idea! One of my favorite things about the blogging world, is all the great kid-friendly craft ideas I come across.
ReplyDeleteEmily, you are so creative! I admire you for doing this with your kids!
ReplyDeleteso creative. :)
ReplyDeleteThat's awesome!
ReplyDeleteWhat a great idea!
ReplyDeleteHow fun is THAT?! My daughter and I will absolutely be trying this one. Thanks for the idea.
ReplyDeleteKathleen
http://www.firefliesandfamily.blogspot.com
What a great jolt back into childhood for me! I bet the kids loved making their own movies:) Your comment on the first photo cracked me up. I have bunches of photos like that which I've taken of Champ (you know, in past days with my old film camera)!
ReplyDeleteOh my goodness, I totally remember doing something like this as a kid. Thanks for the fun flashback! Love it.
ReplyDeleteYou pretty much rock the world, girl! I am so impressed. Such a fun activity!!!
ReplyDeleteThat is a FABULOUS idea!
ReplyDeleteDon't forget to enter to win a tankini of your choice!
clothedmuch.blogspot.com
That looks like so much fun! I am going to have to do that with my first graders!!! Thanks :)
ReplyDeleteThat is so cute! Very clever!
ReplyDeleteThanks for your thoughtful comment today! :)
What a brilliant idea!!! You are so good at capturing imagination.
ReplyDeleteWhat a fun project! My kids would love it!
ReplyDeleteThat is so cool! I love it! What a good idea, thanks!
ReplyDeleteWe will definitely be trying this soon. By the way, Lucas reminds me of Lil Bits with "you draw it for me"...sometimes that's hard to deal with for me. I'm glad that Lucas got better doing it himself as time went on with this activity.
ReplyDeleteWhat a great project to do with the kids! You are such a good mama!
ReplyDeleteWe have so got to try this!!! Another idea for you might be trying those flip books!
ReplyDeleteGreat tutorial! My kids would love to do this. Now, let's see if I can get my act together to do it. LOL
ReplyDeleteSo dang cute. You are so clever and so much fun. I know they loved it and I hope this means that Alex is feeling better!!
ReplyDeleteI think you just won the BEST MOM IN THE WORLD award! You blow me out of the running for sure....as my kids sit and watch cartoons. =)
ReplyDeleteOh man...I LOVED making these when I was a kid...so fun!!!
ReplyDeleteGenius! MY 5 and 7 year old will eat this up!! Thanks for the idea!!
ReplyDelete