


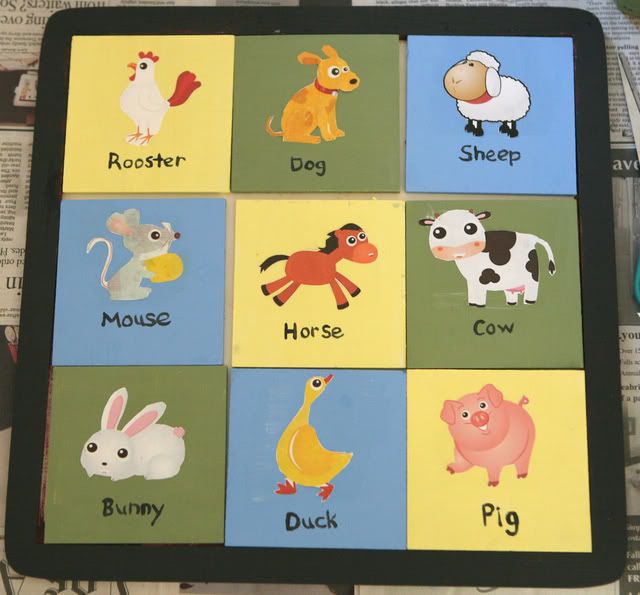
Here is the puzzle.
 And here is how it looks underneath.
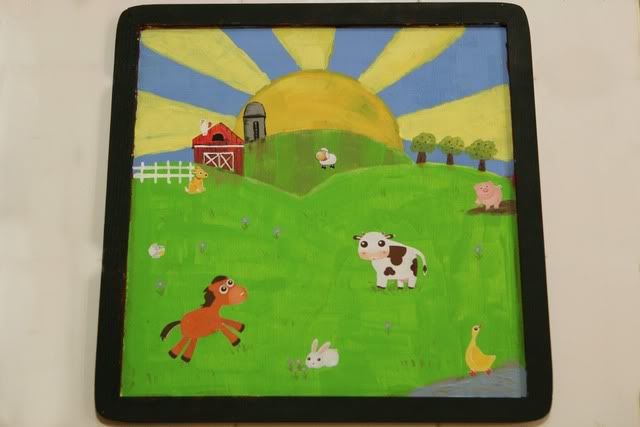
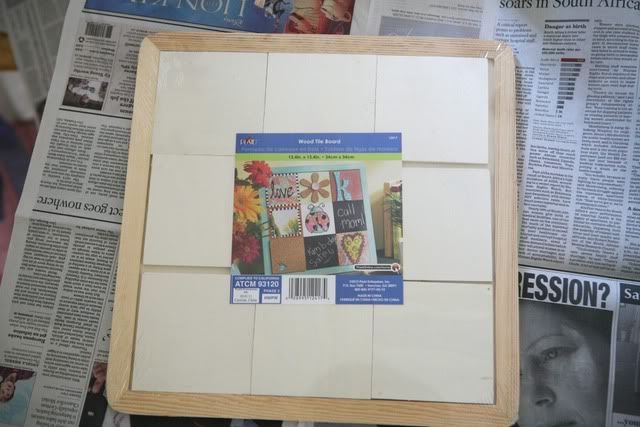
So here is how I did it. I found this board at Michael's a while ago, it is meant for each square to be decorated and then hung on a wall, but I had a different idea.
 I began by painting the squares, I chose three coordinating colors of acrylic paint. I painted the front and then when that dried painted the back and sides.
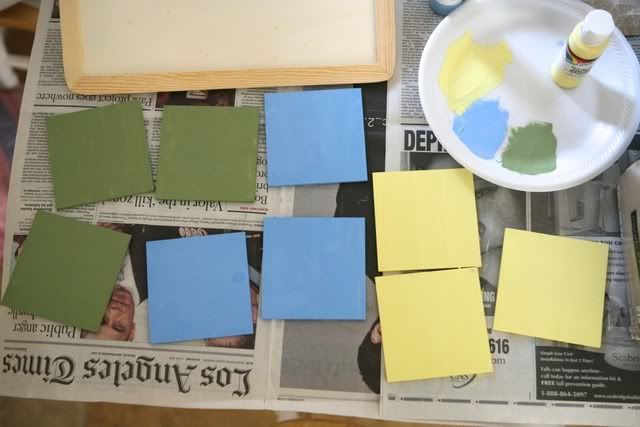 I googled "farm animals" and found a set of 9 animals I liked. The sheep was not part of the set so I had to find him. I printed out the animals on regular printer paper and then carefully cut out each animal. I then typed and printed out all of the names of the animals and used tracing paper to trace on their names. You can just paint the words but I have messy handwriting so prefer to do it this way. I then glued the animals on with mod podge. I found it easiest to paint mod podge on the square where I wanted the animal and then carefully placed the animal down, smoothing out any bumps.
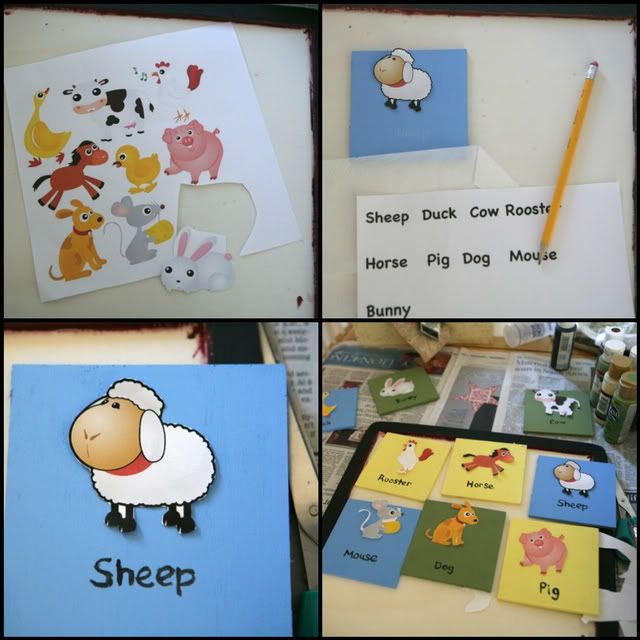 After the paint was totally dry, I painted a layer of mod podge over the entire square to help protect it.
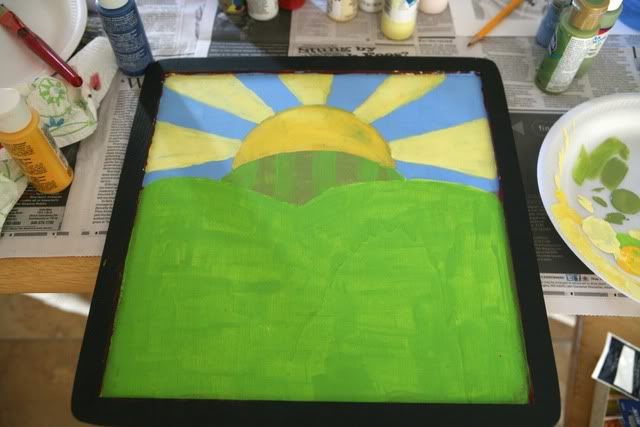
My son already loved it and was happy playing with the squares, but I wasn't done yet. I went online and found a farm scene for inspiration. I printed this out to look at while I painted. I first painted the grass, sky and then when the blue dried painted the sun. I painted the back hill a darker shade of green and then painted stripes from the original grass color.
 I then used the tracing paper and traced the barn and silo from my farm scene print out. I free-painted the fence and trees.
 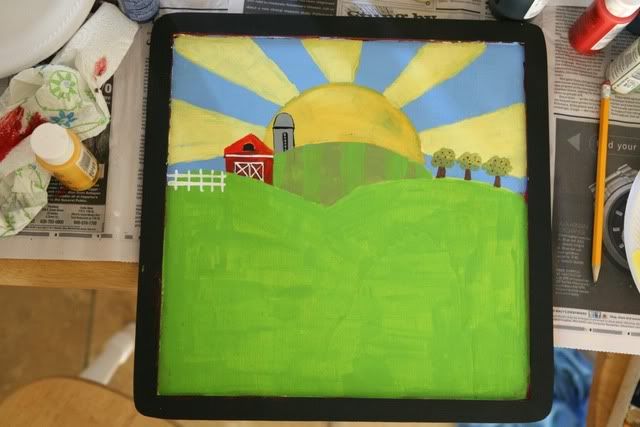 I then took my original set of animals into photoshop so I could separate each animal (I had to do this as the animals I used were a set--if you found individual animals all you need is a word processing program-like Pages or Word). I then resized the animals based upon where I wanted them placed in the picture. I did this a bit by trial and error and did have to print off a few animals a second time.
Something I did not do-which I should have- was paint a sealant over the picture before putting on the animals- instead I ended up sealing around the animals, which was tricky.
Before I mod podged the animals into place, I added some detail to the pictures, small flowers, lines on the barn, shading in spots, some mud for the pig and water for the duck.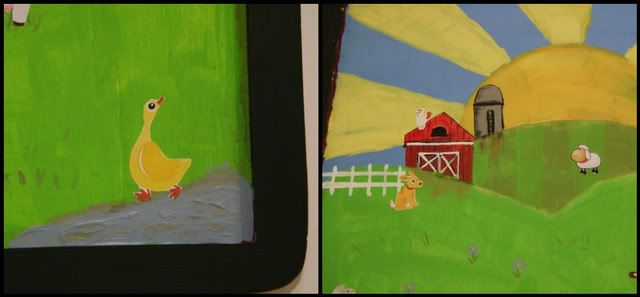 Water: Applied paint thickly to make texture, dry brushed brown along edges, dry brushed in streaks of gold for water.
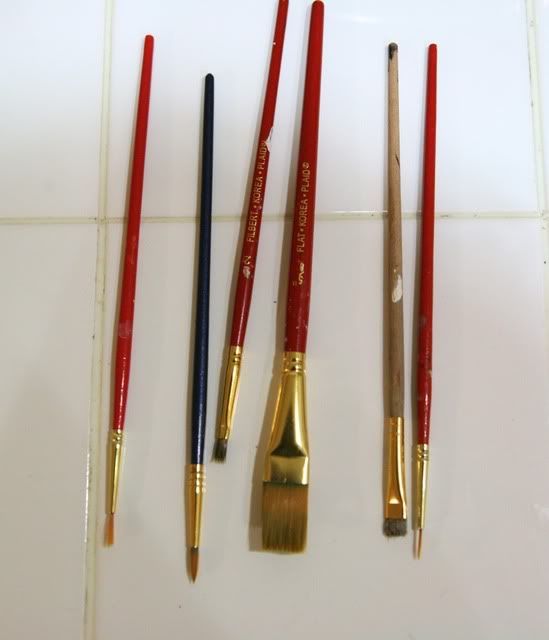
Shading: If you want to add shading to a picture you need to get a great short scruffy stiff brush here is mine--it is well used- I think the handle used to be blue
 Dip the brush in the color you want to shade with and then wipe it on a plate or paper towel several times until there is almost no paint left on the brush, then start at the edge of whatever you are shading and pull down (or sideways in on the case of the silo)
**If you do not enjoy painting you could even mod podge a picture for the background.
And the result- my toddler loves it. He like walking around carrying the pieces and saying the animal sounds- which for him at this point is pretty much growling for every animal. He will put one or two pieces on-the puzzle--when he can get it away from his older siblings that is-they both love it too.
Supplies:
-Wood "puzzle" board-believe it was around $5
-Acrylic paints-various colors (e-mail me if you want specifics)
-Paint brushes-some fine, scruffy brush, 1/2" flat brush
-Mod Podge
-Tracing or transfer Paper
-Computer, Printer, Paper
-Scissors
-Pencil
-Optional: Protective sealant
I am linking this post up at the following crafting blogs


Wow this is so neat! You did a great job with this rather difficult project.
ReplyDeletePinterest is a little too fun - I am finding myself spending more and more time looking around and around and around.
this is super cool, but I'd much rather pay you to do it than do it myself.:)
ReplyDeleteI am beyond impressed. WOW! I'll have to pin this so I can make this in the future!
ReplyDeletePinning this right now! My little one is going to love this!
ReplyDeleteSo so cute Em! I love it!! I'm impressed with your painting, though I always knew you were good! :)
ReplyDeleteThat is the cutest idea! Did it take a long time to make it? It sounds like it would have.
ReplyDeleteThis is so awesome! And the fact that you made it up. I am just not crafty like that. You should link it to Holly's blog on her ... crud...you know what I mean!!! It really came out super cute. :)
ReplyDeleteThat is amazing. Man. I wish I could craft like that.
ReplyDeleteWow....that is awesome (I would be proud of that one too ;)). Love it!!
ReplyDeletehow cool i wish i had done that when my son was little
ReplyDeleteYou did a great job! I need to get all crafty like you!
ReplyDeleteSuper cute! You did a great job!~
ReplyDeleteLook at you getting your crafty on! That is totally awesome.
ReplyDeleteYou have gone beyond me. I am VERY impressed.
ReplyDeleteDo you have somewhere separate from your kids that you do these crafts? My kids lunge for any type of craft I bring out...and promptly wreck it.
Actually just did it on the kitchen table- when we moved I lost my craft room. My oldest two were painting with me- painting a picture of a barn on a canvas- Ryder was wandering around dumping out boxes of macaroni.
ReplyDeleteI did it over a couple of days on and off- but maybe three- four hours total?
I LOVE IT!!
ReplyDeleteWhat a darling little puzzle! I am impressed by your talent. Really. You are amazing!
ReplyDeleteWow … I'm so impressed. You did a fantastic job. This is cute as heck and here I thought you were just going to cut up some pictures or something!
ReplyDeleteSuper cute, Emmy and you did a great job!!
ReplyDeleteThat looks great! I'm pinning this so I can come back and try it for myself!
ReplyDeleteWow! Emily...seems like these are going to be in demand in every church nursery across the world! Beautiful! Wow!
ReplyDeleteVery cute!!! And it looks like you bought it somewhere, instead of making it! :)
ReplyDeletedang cute
ReplyDelete