


Pin It
 I really wanted a window with four sections, but was only able to find ones with two- but the window was only $5- so I decided to make it 4 by adding some mullions (those dividing boards on the window)
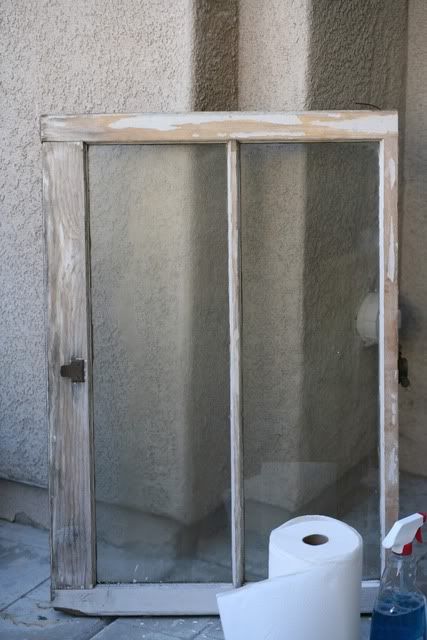 To add the mullions, I used a thin molding strip, Gorilla glue, and paint. I even used my husband's miter box and saw to cut it myself! I was so proud.
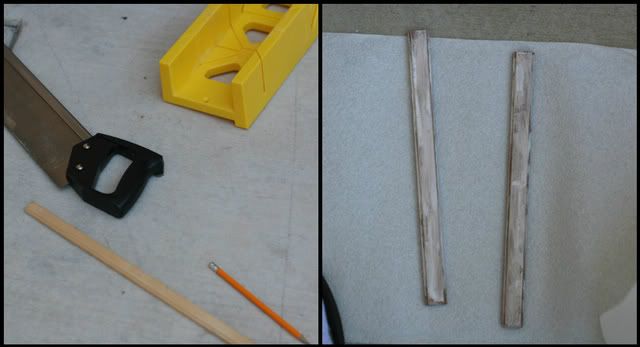 I then used acrylic paint and painted a base coat of brown. I then dry brushed white over it, doing it very messy and then even sanding it to match the old look of the rest of the window. Just use a very thin coat of gorilla glue in the middle as it expands and after an hour of drying it was not going anywhere.
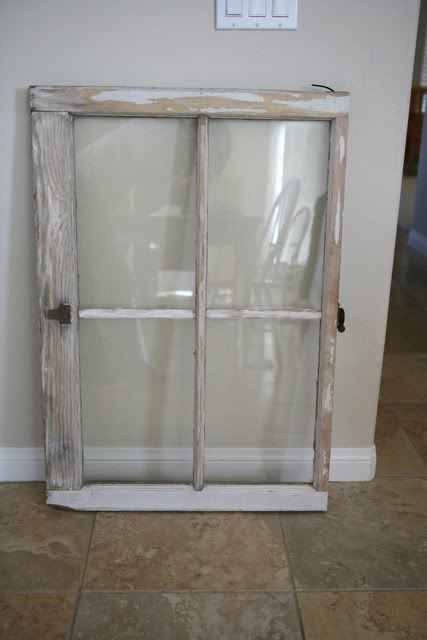 The night we were mounting the hardware to it to hang, well if you are trying to step over it and miss and step on the glass-the glass will break.
But as in most projects you have to roll with the punches. Since the window was old it was fairly easy to remove the glass-- though amazingly difficult to break the glass purposely to remove it from the other side.
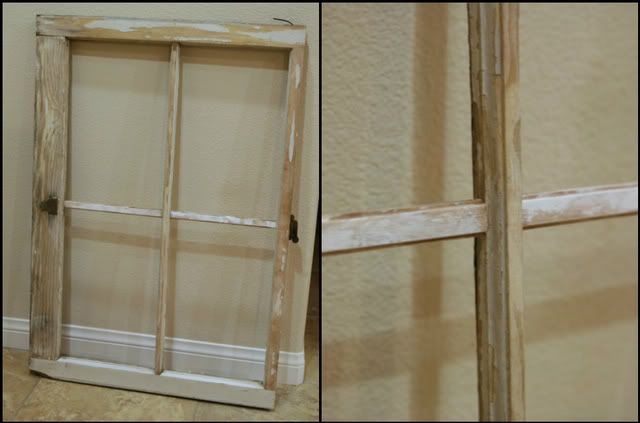
When the glass came off, so did my carefully crafted mullions. Luckily I had enough extra to cut a couple of more. This time I cut them slightly larger so that I could slide them and they were a very tight fit; I did add a little gorilla glue to the ends before sliding it into place. And in the end, I like it a lot better without the glass.
In The Window Decor
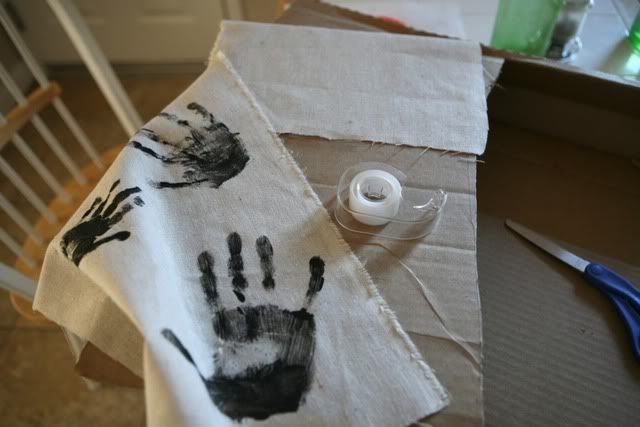
I knew I wanted to do something with my kids handprints, yet I also wanted the option for changing things up someday. I found a piece of cloth I liked at the fabric store and used black acrylic paint to do my kinds hand-prints on the fabric. I then attached the fabric with just regular tape to a piece of a card-box box that I cut(it was the box my canvases got shipped in-look at me upcycling!). Unfortunately I didn't quite measure the material accurately the first time, so I had to add some extra to help cover up the entire cardboard, roll with the punches!
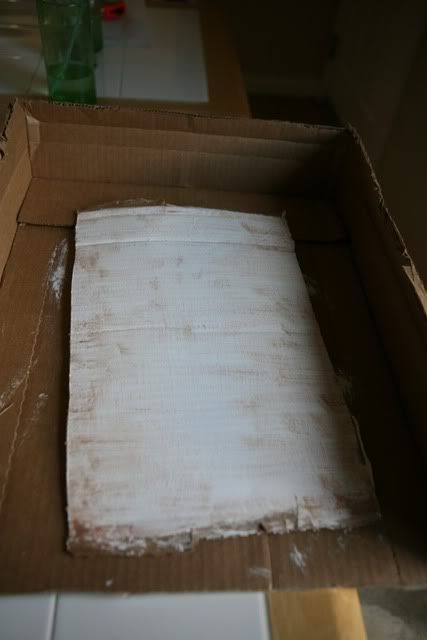
 I then found this poem online- it actually says Ten Little Fingers- but I just took off ten to match the hand-prints better. I used my Silhouette to cut out some vinyl letters; I intended to stick them to a matching piece of fabric-- but NOTE: regular vinyl does not just stay on fabric-- yea, so I ended up cutting another piece of cardboard from the box
I painted it with a base-coat of white and dry-brushed brown. When you dry brush start from the edges and work in, to ensure that the thicker applications of paint are on the edge.
 Then I applied the letters to the cardboard and it worked perfectly!
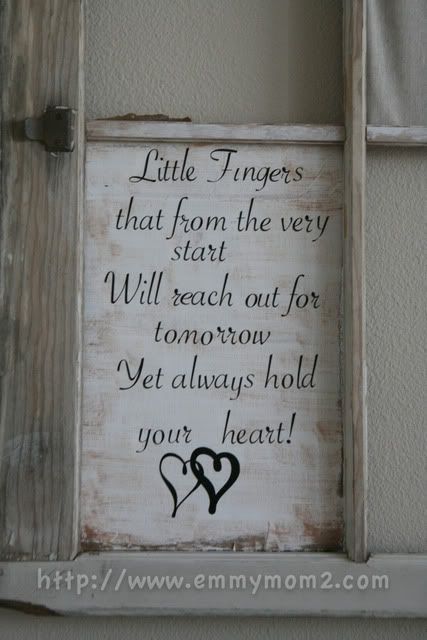 I simply duct taped both pieces of cardboard to the back of the window.
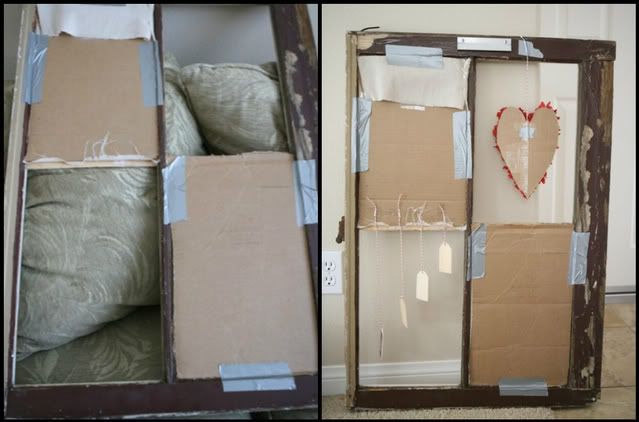
 For the other two squares I added some seasonal decor- both of which I made for super cheap and easy-- I will teach you how to make the heart and the Love letters tomorrow.
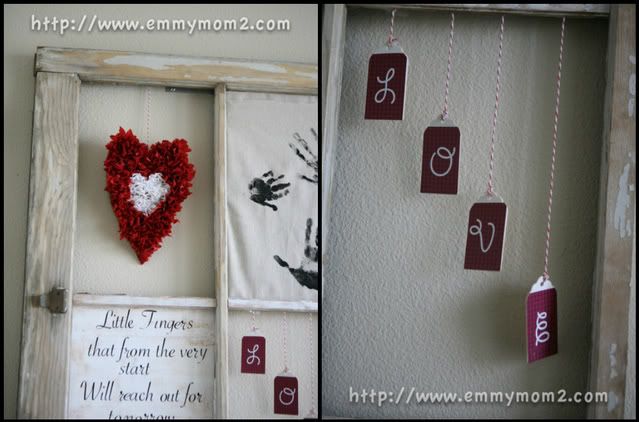 I had four canvases from my kids latest photo shoot printed, all 12X12 that I got from Winkflash for 60% off. I was very surprisingly happy with the quality and print (I was a bit worried- but black and white are great from there)
And success!
 Every holiday or month I plan on changing the decor in the two holiday areas. And you know I think I am going to love it forever!
Since it is Tuesday I am linking up with Impulsive Addict and Seriously Shawn

And all my favorite crafting parties
I am linking this post up at the following crafting blogs


Super cute!! I love the window!
ReplyDeleteI adore how the project came into being with a dream and a bit of tweaking along the way. Don't you think those are the kind of works that you really cherish because it reflects your creativity all the more?! What an awesome idea!!!
ReplyDeletePS- just found winkflash myself and have also been pleased with the price AND quality
Totally precious!! Great job!
ReplyDelete~Becca
Wow I love it! I really think this is adorable. You did an awesome job!
ReplyDeleteMaybe we can learn this style in my new home.
ReplyDeleteI also like to read the Book of Mormon. So are you a church member? We come from Taiwan and speak Chinese. My wife and I will visit California. Do you have any suggestion?
This is definitely my favorite craft I've seen you do! I would LOVE to have this in my own house! Being able to change out two of the sections for seasons and holidays is a GREAT idea, too! Way to go, girl!
ReplyDeleteI LOVE it! I want to do an antique window project SOOO bad! But those things are seriously expensive around here! A super hot commodity! I'm so jealous you found one for only $5!!
ReplyDeleteVery cute! Love it! And I can't wait to see it in person!
ReplyDeleteI absolutely love all your projects.
ReplyDeleteToo cute! I love the handprints!
ReplyDeleteYou have way more energy than I do to change it out for the holidays... Mine would still be on Christmas at this point, lol
I love old windows and giving them a new look! I've done a few myself, but I just love how you did yours! It looks amazing!
ReplyDeleteStefanie
http://myblissfulhappiness.blogspot.com/
Girl! That is AWESOME!
ReplyDeleteI simply ADORE this!!! Oh where oh where can I find me some old windows?!?
ReplyDeleteAnd where can I hide them from my husband while I work on them (cause I know he would say what do you want an old window for?)
I love the window, and how you've used it. The handprints are the cutest! Thanks for your comment on my blog -- I replied on the post to your question but wanted to make sure you saw it.
ReplyDeleteJenny
That is amazing and so beautiful. Great job.
ReplyDeleteAwesome job! That really looks so great on your wall!
ReplyDeleteLove this!! You're so good at being crafty...all of my DIY stuff ends up looking crazy!!~
ReplyDeleteWow! That looks awesome. I love the new look. I've been wanting to do a window project, but haven't had a chance to go window hunting.
ReplyDeleteYou have some of the cutest projects :)
Oh I absolutely LOVE that! I'm so adding that to my 'to do' list for a sooner-rather-than-later project! :)
ReplyDeleteMadonna Still Rocks, M.I.A. Steals the Headlines, and Another Stray Cat
I totally have "old 4 paned wood window" on my want list! I love how you designed it and how you decorated it LOTS!!! Very impressive!!!
ReplyDeleteXO, Aimee
PS Thanks for your sweet note about my desk on my blog earlier! Totally made my day!!!
That came out soooo cute!!! Love it! And I totally thought today was the second Tuesday(last night) where's my brain anyway?? Great job girl!
ReplyDeleteSo cute, Emmy!
ReplyDeleteSome of the best projects don't turn out anything like you planned originally, huh? Love this!
ReplyDeleteI love this idea! I have been looking for creative wall art ideas. So, thanks for this!
ReplyDeleteYou always amaze me! I love your creations. You and Viv are my favs. I should start a folder with my favorite crafts from you two.
ReplyDeleteI love the idea of changing out the holiday areas.
Love you for linking up with us! xoxo
This is gorgeous, you are so creative!
ReplyDeleteIt really turned out wonderfully Emily! and I love how you displayed it with the photos. Great job!!
ReplyDeleteAnd p.s. you should put a "pin it" button at the bottom of your posts like this so it is easy for us to put on Pinterest. The code is on the site under help. :)
That turned out so cute!!! I would love to do something like that. I like that you can change it out easy too.
ReplyDeleteLOVE this! What a great project. I have been on the lookout for an awesome window pane too.
ReplyDeleteThat is so cute and what a difference it made on your wall!! I love it!
ReplyDeleteoh quelle bonne idée! ce très jolie...
ReplyDeleteSo cute I pinned it! I have a window in the garage and now I know how to use it!
ReplyDeletevisiting via IA and Shawn
Emmy, you amaze me with your craftiness! I think this is my favorite craft of yours yet. It turned out so well!!
ReplyDeleteGreat job :)
Way to go, Em!
ReplyDeleteEmmy you did a great job!! Your window is beautiful as is the Valentine Decor!
ReplyDeleteI am so in awe of the fact that you added to your window to make 2 more panes - Amazing!!!!
I absolutely love this. This came out so beautiful.
ReplyDeleteThis is the second "window" project I have seen today. I love it. Any suggestions on where to look for old windows??
ReplyDeleteYay!!!! I have a window with two sections and was wishing I could figure out how to do something with it. I love this idea and am totally stealing it.
ReplyDeleteThat is beyond adorable! I'm not crafty and couldn't do it easily but I'm in awe of people like you who can create beautiful things like that!
ReplyDeleteI so wnt an old window like this. I almost had one a few years ago too
ReplyDeleteThis is TOO CUTE!!! Thanks for sharing it again at my party!!! Happy Valentine's Day!!!
ReplyDeleteXO, Aimee
I adore old windows and this is pretty much genius. I love the elements you added and well, the hand prints...cute!
ReplyDelete