


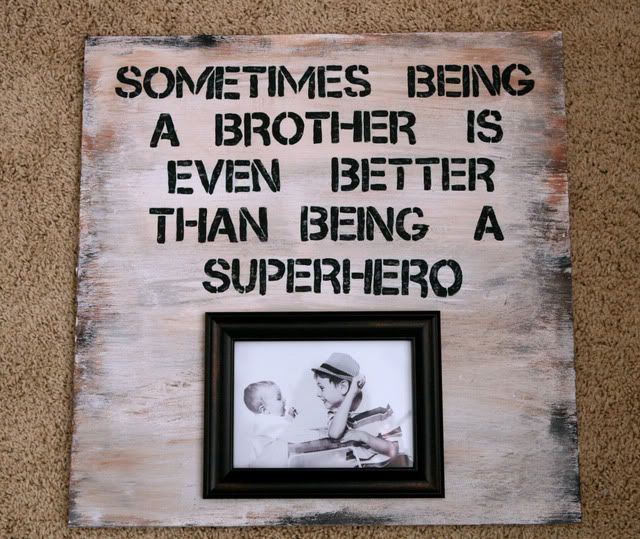
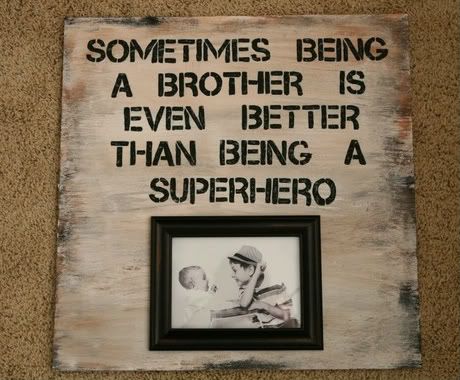
I saw this quote about brothers on Pintrest a while ago but wondered what I could do with it, and then I remembered one of my all time favorite pictures of my two boys and got the vision for what I wanted in my head.
Here is what you will need to make one like it:
Supplies:
-Board- mine was cut to 19X19"
- Picture frame- mine is 5X7 size
- Paint- I used Acrylic paints, white, brown, black, antique white
-Paint brushes- large flat brushes, flat small stencil brush, flat shader
-Tracing Paper
-Computer/Printer- to print picture and print font/words to trace
I began with a board I bought at Home Depot- the board was 24X24 for around $10- I did not want it that big so my husband cut it down to 19X19. I think I got that size because I wanted equal space on either side of the frame- so your size of board will vary depending on your frame.
 I went to the dollar store to look for the picture frame, intending on painting it- but I found one just the right size and color, I was thrilled.
I first painted the board white. I usually buy the small bottles of acrylic paint-however for white, black and brown, I usually buy big bottles as those are colors that are used all of the time. I then intended to use my can of stain to antique it-however, when I went to pull out my stain, it turned out it was actually a protective finish and not stain- so on to plan B.
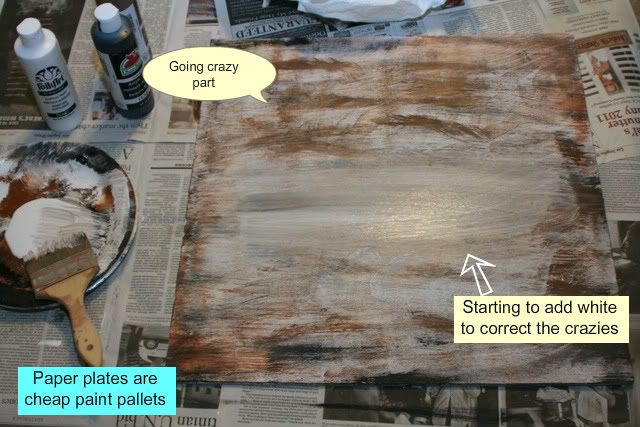
I then used my big brush to dry brush in brown. To dry brush- dip your brush into paint then wipe it on a plate or your paper towel several times until hardly any paint remains. Start at the edges and then pull in.
This part is not a precise science and is up to you how it looks. When I added the brown, it was too dark at parts and too brown for my taste, so I added some black, and then well I just started going a bit crazy and just streaking and slapping on paint everywhere. It was a bit too much color though, so I then finished it by cover mostly just the middle section with one more dry layer of white so the words would show.
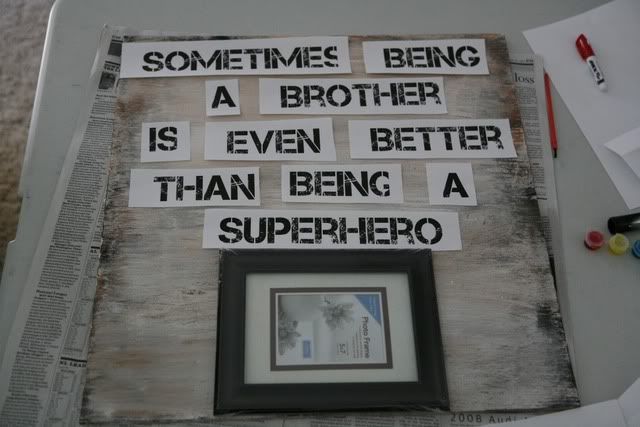
 Once I got the board a color I wanted- I needed to find the font I wanted. I had pinned a few sites with great free fonts- but ended up finding my font at dafont.com -- it is under the stencil category called Capture It. I measure the board and guessed about how big I would want the words, typed them up and printed them. ***
***If you have one of those fancy cricut machine- (anyone want to buy me one?) you can make vinyl letters rather than paint the words on. Or you could also use stencils-- I am just showing you the method I did.***
I then lay the words on the board- realized I wanted them a little bigger and printed again-yea measuring first may have been better.
 Once I had the text the right size, I used a ruler to measure and put little dashes for where the bottom of my text in the first line should line up. Luckily, this font is very straight- so it was fairly easy to line up. I put down my tracing paper and lined up my words on the dashes that I could barely see through the tracing paper. I used a blue tracing paper-since I was tracing onto a white surface.
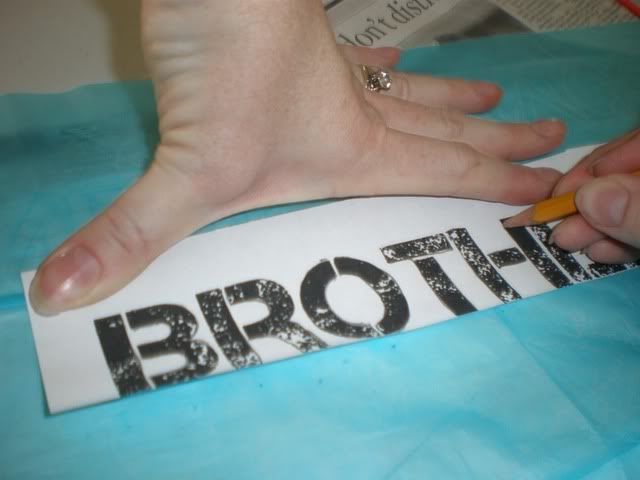 You trace the letters by outlining with a not very sharp pencil-so you can push hard- the letters or object you want.
After tracing the first line of words, I went onto the second, once again measuring and marking. I then measure how much space was between the first and second line and used this number for the rest of the lines. It might not have been exact and perfect in every space, but it was close enough. If you had painters tape, you could measure and then tape down a line so you know where to place your words.  All the words traced on the board
All the words traced on the boardThen the painting began. I used my little flat stencil brush, it was about the same thickness as the letters, and carefully painted every letter starting at the top. I watched TV while doing this to make it more entertaining :) I loved the distressed look of the text I had printed- but I decided to just print the letters solid black first...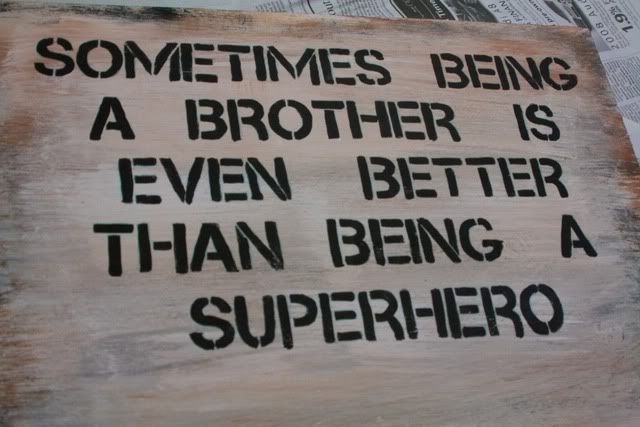 and then I went back with my small scruffy shader brush and very dry brushed in some dots and spots with antique white (hint: antique white looks more brown if you looking for it in the store). And don't worry about being neat or consistent as it is supposed to look scruffed- my new favorite made up word.
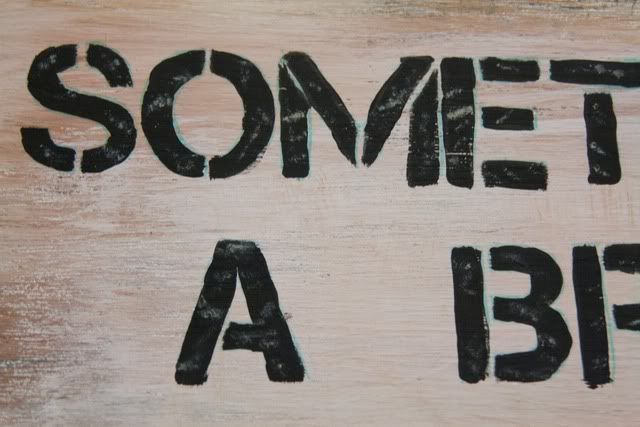 The letters scruffed up
and then I went back with my small scruffy shader brush and very dry brushed in some dots and spots with antique white (hint: antique white looks more brown if you looking for it in the store). And don't worry about being neat or consistent as it is supposed to look scruffed- my new favorite made up word.The letters scruffed upThe blue is from the tracing paper--when the paint is all dry-simply take a barely wet paper towel and carefully wipe over the blue lines and they disappear like magic.
And finally the frame. First print the picture you want in the frame. The frame I chose is one that can sit on a desk- so I put the picture in and used the clips that are supposed to hold the back on to directly hold the picture in and did not use the back.
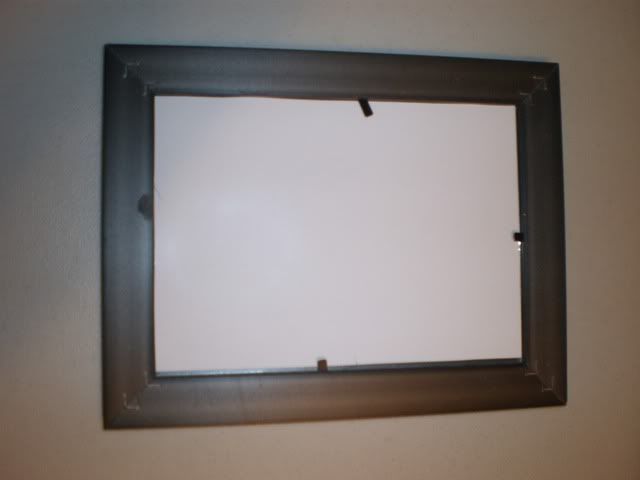 I then glued- can use hot glue or crazy glue- the frame into place. And there it is- though in this picture the frame was not actually glued on yet- I was just too excited and wanted to get a picture.Finally, Ryder's bare walls will have something on them.
If you have any questions, just ask in the comments as I would love to help.
I am linking this post up at the following crafting blogs


I love it. Super cute and it sounds like you had fun doing it.
ReplyDeleteThat was amazing! I might be able to do that...even with being crafty-challenged :)
ReplyDeleteI love it. However, I will buy letters because I do not have the patience to do that myself. :)
ReplyDeleteGorgeous, awesome, perfect! I can't think of enough adjectives to describe how much I love this. Now I'll have to figure out how to incorporate this into my little man's room!
ReplyDeleteSo very cute, Em! I love that picture of your boys! So sweet!!
ReplyDeleteGreat piece!
ReplyDeleteSuch a cute craft! I'm not certain mine would turn out so cute, but your tutorial was great. :)
ReplyDeleteVery fun. I really love how it turned out! And perfect to hang in Ryders room too!
ReplyDeleteHmmmm....my wheels are turning...can you see? They are going very slowly as they very rusty, but they are def turning. this is great project. Better be careful... you might get asked to host RS super sat! ;)
ReplyDeleteTell you what, you come stay with me for a week. I will cook you lots of yummy ethical meals, and you can make my place look like a competant mother lives there. Deal?
ReplyDeleteThat is adorable! Nice job!
ReplyDeleteLove love love love!!! I pinned it! :)
ReplyDeleteSo, how the heck do you add that pin button to your posts??
I love the board, I never would have thought to buy that!
ReplyDeleteHow sweet! I also made Keith a sign with that quote on it. I love that quote. Yours turned out far better than mine. But then again, you have been crafting for years, and I just started. :) Love it.
ReplyDeleteWhat a cute and GREAT idea! LOVE IT
ReplyDeleteI love this SO MUCH!
ReplyDeleteNice tutorial! It could even let someone like me, non-crafty person, look like knew what I was doing. Thanks!
ReplyDeleteOMG! You are so crafty! I could NEVER do this. EVER! You made it look easy but I know for me it wouldn't be. I don't even own any paint brushes. Sad huh?
ReplyDeleteI absolutely love this craft! Thank you so much for sharing. I found you through out of this world. SO loving your blog!
ReplyDeleteSuper cute!
ReplyDeleteMade me smile! Great job!
ReplyDeleteOOOOOOOOOOH!!!!!!!!!!! I saw this on pinterest too and LOVE LOVE LOVE that you did it!!! It looks so good girl!! :) So sweet!!!
ReplyDeleteLOVE that quote and LOVE what you did with it! Thanks for sharing it.
ReplyDeleteI love this quote and how you incorporated in into the sign. It is so meaningful and precious. I have a party going on over at my blog that is dedicated to using your craft stash items. The link is open for most of October and I would love to have you join! Here is the link if you are interested: http://mylilpumpkinpatch.blogspot.com/2011/10/document.html
ReplyDeleteOMG! This is so cute! I'm working on my son's superhero room and this quite is PERFECT! Thanks for sharing at Craft and Tell! I'll be featuring you in the next party, so feel free to stop by and grab a featured button : )
ReplyDeleteSo glad you posted how you created it! I enjoy reading creative, affordable tutorial!
ReplyDeleteI totally loved this when you posted it on your blog a couple weeks ago so I'm thrilled that you posted a tutorial on how you did it!
ReplyDeleteI had no idea you could trace words like that!!