As my next part of my tips/projects from my
master bedroom makeover, I am going to show you how I redid my book case. You can see the rest of my
master bedroom makeover here.


This book case used to be in my husband's bedroom when he was a teenager. It is a good sturdy piece but needed a facelift.
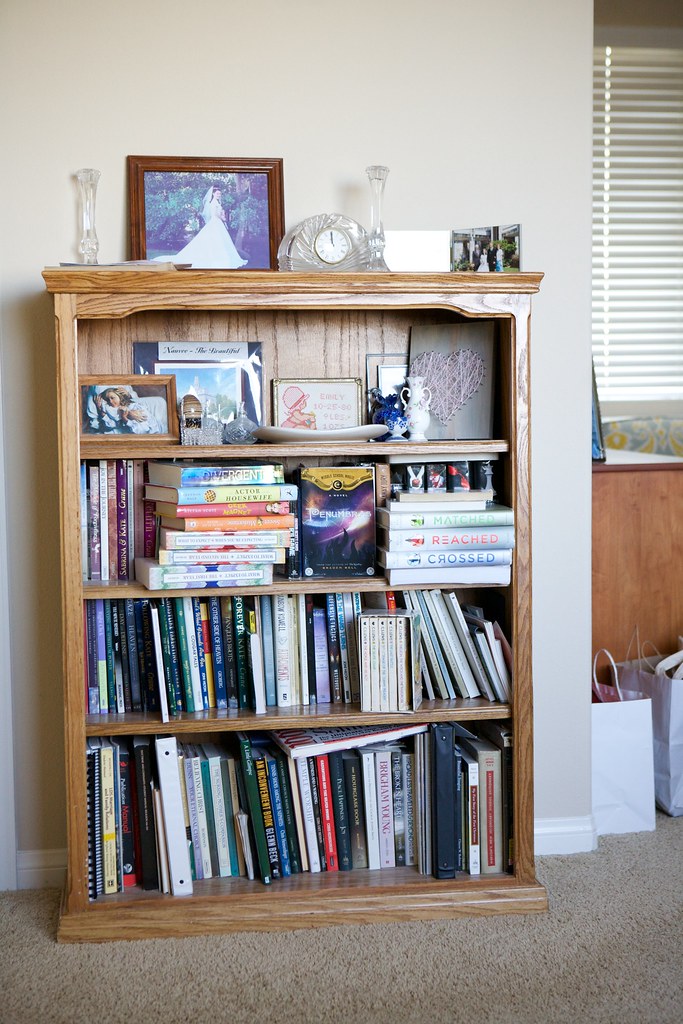
It was over flowing with books and really just a mess of things. The piece is solid wood but I did not want to have to sand it, so my favorite Annie Sloan paint to the rescue. If you have not ever used Annie Sloan, here is a few tips.
Tips for Painting with Annie Sloan Paint

**These tips are for painting pieces using chalk paint with more of the solid look, instead of distressed/antique look.
1- No Sanding or primer is required. All you need to do is wipe down the piece and clean it then start painting, really is that easy.
2- The paint goes further than you think. You may get a sticker shock when you first price the paint, but keep in mind it goes a lot further than you think. I used 1 quart of Paloma gray and was able to finish the book case and the bench and still had a tiny bit of paint left. (1 quart of the yellow did two nightstands and a bookshelf) Keep in mind though that different wood may suck in paint more than others. Also if you want a more smooth look, then you should actually thin your paint out with a little water. If you want a thicker look, then leave the lid off for a bit to let the paint thicken up.
3- Use good brushes. Nothing worse than having little brush hairs come off while painting. Also what style of brush you are using will depend on the look you are going for.
 4- Two coats of paint-
 Paint one coat then when dry paint a second as needed. Usually by the time I get to the end of piece, where I started painting is dry enough to do the second coat.
5- Wax it- Once fully dry wax the piece when finished. Annie Sloan has a clear or dark wax, I have just used the clear wax. The dark wax will darken the color a bit and give it more of an antique look. There are wax brushes you can buy, I just use an old soft cloth and rub down the whole piece. Waxing it protects the paint stops it from being a chalkboard like surface.
6- Distress It: If you want to distress a piece, which this paint is really great for, distress AFTER doing a coat of wax, and then wax the piece again.
The first thing I did was put down a protective drop cloth (I just bought a cheap plastic one from Home Depot), as no one wants to spill on the carpet or floor.

I took the shelves out of the bookshelf and put the shelf hardware into a baggy so it wouldn't get lost.
I then began painting. For this piece I used Annie Sloan Paloma gray, it is more of a pink/purple based gray and when you first paint it looks a lot lighter than you may expect, it does darken as it dries and would darken even more with a dark wax.
I usually start at the top of a piece and work my way down. For big surfaces I use my big giant brush, but then switch to a smaller brush for the edges and corners.

I was not planning on painting the back, but as paint would drip or if I had too much paint on my brush I would just wipe it on the back as I knew I would be covering that.
I lay the shelves on the drop cloth and painted them there. Some people asked if the wood grain shows through. This paint is able to cover up the wood grain and only in places where it was especially strong can you see a few lines.

Adding Decorative Paper to the Back
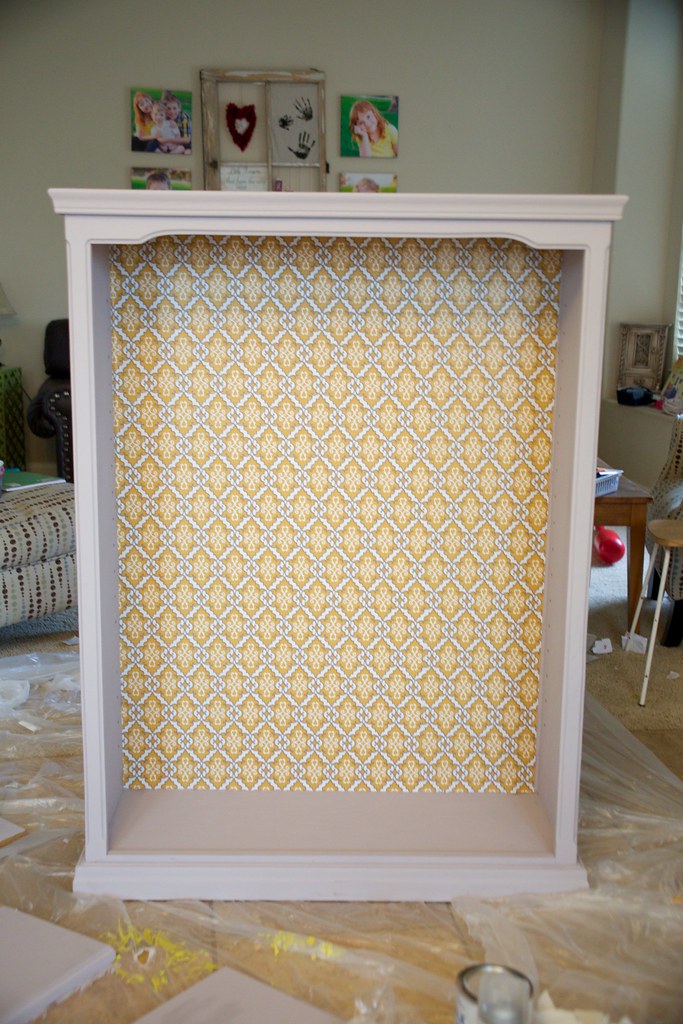 I wanted to have a background that would really pop, I also wanted it to be simple and easy. Unfortunately, I did not take many pictures during this stage, as I was home by myself, working up a sweat (literally) to get the back wall papered.
For this piece I used a really thick wrapping paper I found at Tai Pan. You can also use contact paper (which I did for my yellow book case I will be showing you soon).
I measured the piece for length, it was not wide enough, so I had to use two pieces.
I actually lay the book shelf on it's back, as it felt easier to lay the piece down then put the paper on (not sure if it was easier this way or not?)
I cut the first piece and sprayed it with a quick drying adhesive. I then carefully lined up the paper starting at the top upper right hand corner.
I wanted to have a background that would really pop, I also wanted it to be simple and easy. Unfortunately, I did not take many pictures during this stage, as I was home by myself, working up a sweat (literally) to get the back wall papered.
For this piece I used a really thick wrapping paper I found at Tai Pan. You can also use contact paper (which I did for my yellow book case I will be showing you soon).
I measured the piece for length, it was not wide enough, so I had to use two pieces.
I actually lay the book shelf on it's back, as it felt easier to lay the piece down then put the paper on (not sure if it was easier this way or not?)
I cut the first piece and sprayed it with a quick drying adhesive. I then carefully lined up the paper starting at the top upper right hand corner.
 I pressed down the top and ran my hand back and forth on the paper as I lay the rest of the paper down, smoothing out any air bumps. This part was actually quite tricky and the paper kept trying to roll up on itself. I definitely recommend having a second set of hands to hold the bottom of the paper to make your life easier.
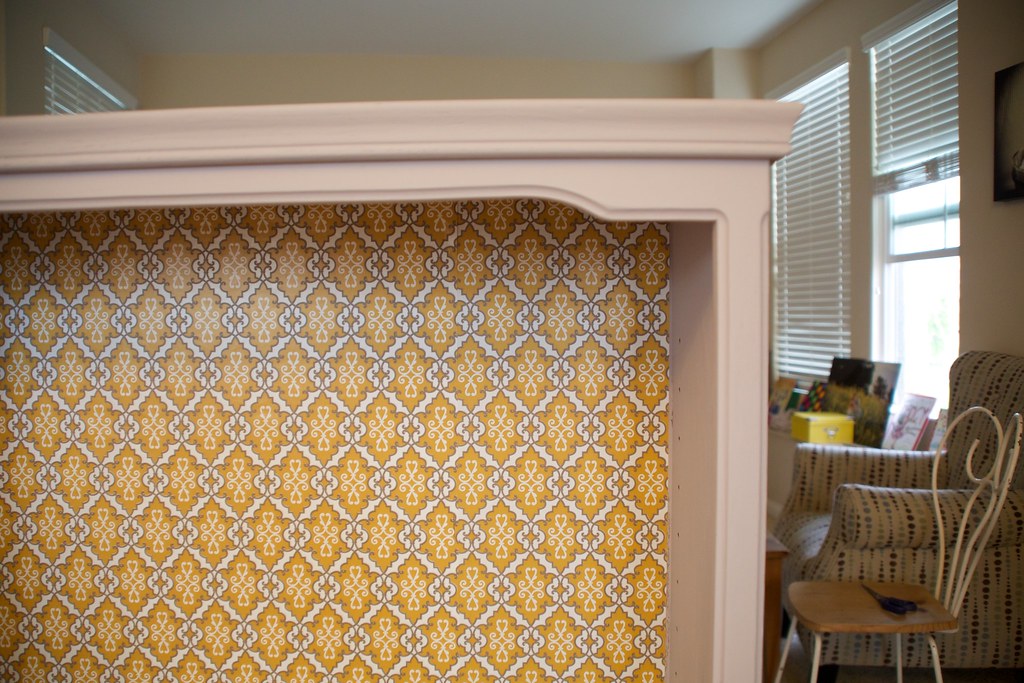
For the second piece I had to make sure the pattern was lined up correctly. (I should have started at the top of the pattern on the first piece but I did not) I measured how much of the diamond shape was shown from the top piece, and measured that same on the second piece and cut so the top diamonds lined up.
I then cut the correct length AFTER I made sure the starting point was correct. I lay the piece in the book case to ensure it was correct before spraying the piece. I sprayed the second piece and lay it so that it lined up correctly with the patterns in the middle, where it overlapped.
This actually left a little extra on the left hand side, as it was too wide, but after I pressed the piece into place, I just took a pair of scissors and ran it down the inner corner of the book case and cut off the extra paper. Again, I am sorry I did not take more pictures during this.
Once the piece was all dry, I actually waited until the next day as I had finished painting in the late afternoon, I waxed the entire piece. I started at the top and especially concentrated on the edges and corners or any part that might get bumped.
Once the shelves were all dry, I added the hardware back in and there was my finished piece.
I pressed down the top and ran my hand back and forth on the paper as I lay the rest of the paper down, smoothing out any air bumps. This part was actually quite tricky and the paper kept trying to roll up on itself. I definitely recommend having a second set of hands to hold the bottom of the paper to make your life easier.
For the second piece I had to make sure the pattern was lined up correctly. (I should have started at the top of the pattern on the first piece but I did not) I measured how much of the diamond shape was shown from the top piece, and measured that same on the second piece and cut so the top diamonds lined up.
I then cut the correct length AFTER I made sure the starting point was correct. I lay the piece in the book case to ensure it was correct before spraying the piece. I sprayed the second piece and lay it so that it lined up correctly with the patterns in the middle, where it overlapped.
This actually left a little extra on the left hand side, as it was too wide, but after I pressed the piece into place, I just took a pair of scissors and ran it down the inner corner of the book case and cut off the extra paper. Again, I am sorry I did not take more pictures during this.
Once the piece was all dry, I actually waited until the next day as I had finished painting in the late afternoon, I waxed the entire piece. I started at the top and especially concentrated on the edges and corners or any part that might get bumped.
Once the shelves were all dry, I added the hardware back in and there was my finished piece.
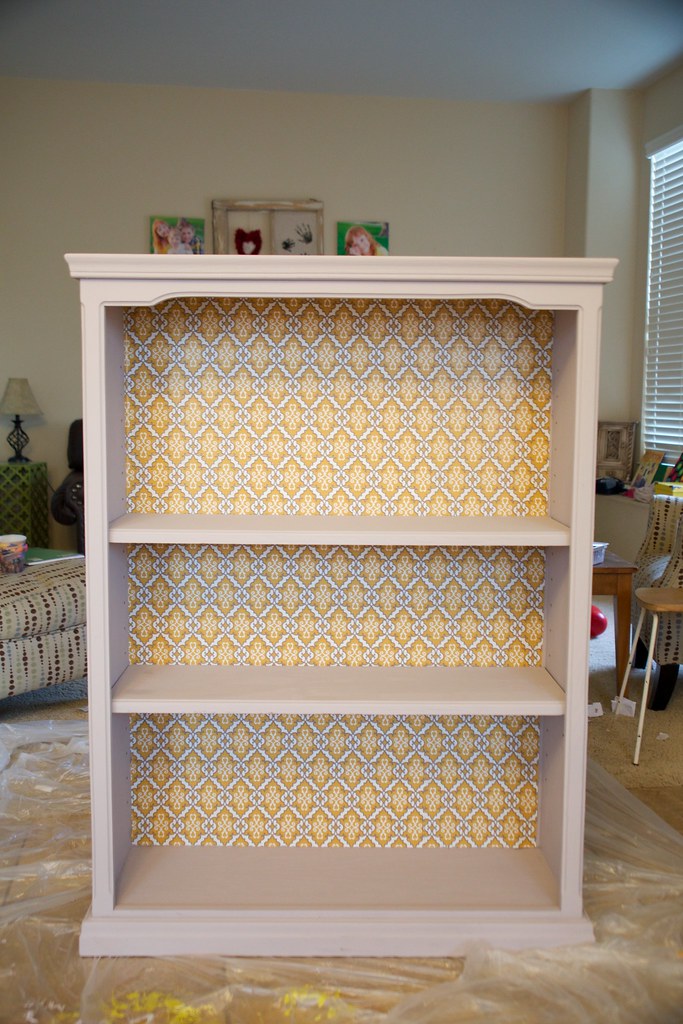 I didn't put in all the shelves as I knew I wanted to display things more and have less books on this shelf, also I wanted to show off the background a bit too. I did paint the extra shelf and have it stored in case I change my mind later. That is my painted bookcase.
 Click to see the rest of my bedroom makeover, where I will continue to link these tutorials as they are finished.


Love the paper, it really makes this piece!
ReplyDeleteYes I agree- makes it just so much more interesting to look at
DeleteThe wallpaper makes this piece so special. Darling!
ReplyDeleteThat sounds like it was a LOT of work! But I guess the end result is the payoff. And if you're going to do something you may as well do it right. How do you think cloth would be for the background? Easier? Harder? It is absolutely beautiful! I don't paint a lot but I have never heard of waxing it. Sounds like a good idea, though.
ReplyDeleteCloth might be a bit easier, but you would still have to get it smooth— one idea I have seen is to cut cardboard and cover it with a cloth and then just pop a piece into each shelf, or I guess you could even do the whole back, that way if you decide you don’t like it you can change it out. And yes definitely should wax or finish a piece of furniture if you want the paint to last.
DeleteLove it. You did a fantastic job! I am in love with chalk paint and this one is a beautiful color!
ReplyDeleteThank you so much! chalk paint really is so awesome, so easy to use
DeleteAs I told you I think it all looks so fantastic!
ReplyDeleteThank you so much! I will hopefully get the next tutorial up tomorrow actually..
DeleteOMG, looking at that bookcase closer, I'm fairly certain I have the same bookcase in my old bedroom at my parents house.
ReplyDeleteThat is too funny! You should totally get it and paint it :)
DeleteI LOVE how it turned out! What an awesome project :D
ReplyDeleteThank you so much!
DeleteSO cute! Way easier than sanding too. I love it! Being crafty is so much fun!!
ReplyDeleteYes! I really like making things as simple as possible.
DeleteGreat tutorial and gorgeous bookcase! I've got a couple of pieces from Goodwill I need to refinish that I've been chickening out on but this may help me get a little braver!
ReplyDeleteYes you should totally do it! Take pictures as it is always so fun to see the before and after
DeleteThis is such a great idea! I love this.
ReplyDeleteIt's gorgeous! My bookcase may be in grave danger now! ;)
ReplyDeleteOh let me know if you redo yours!
DeleteI've been dying to try Annie Sloan's paint! Your bookcase looks amazing. I just need to find a piece of furniture to transform!
ReplyDeleteHit up the thrift stores, there are often so many piece that are good but just dated but with paint would be amazing!
DeleteThanks, for a great post. I won't be linking up today since although I do folk dances, I don't have any to showcase yet. Good Job!great post to read
ReplyDeleteThis comment has been removed by a blog administrator.
ReplyDelete