




Showing posts with label MasterBedroom Makeover. Show all posts

Tuesday, April 8, 2014

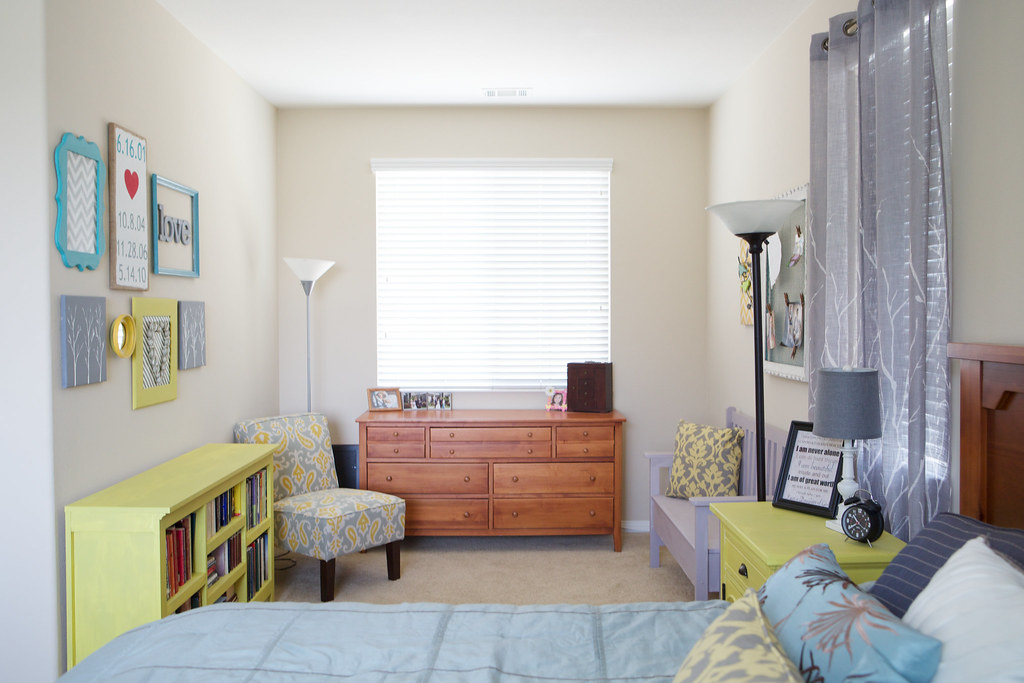
Final Master Bedroom Makeover Projects

Today I am going to show you the last of the projects in my master bedroom makeover.  To see the whole project, see this post here.

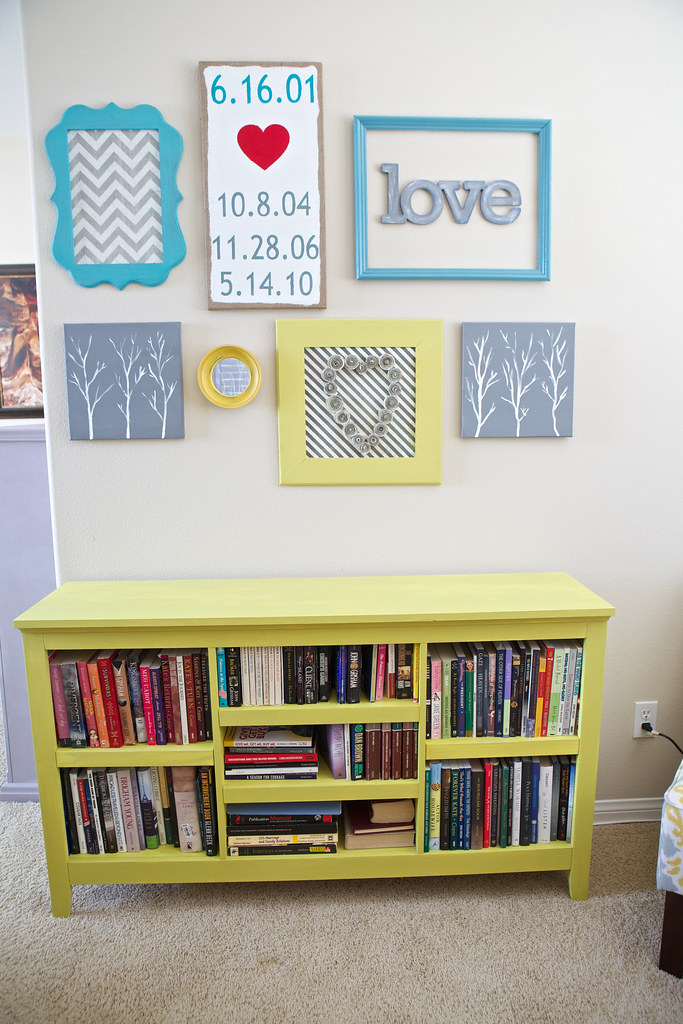
The Wall Decor
Reading nook

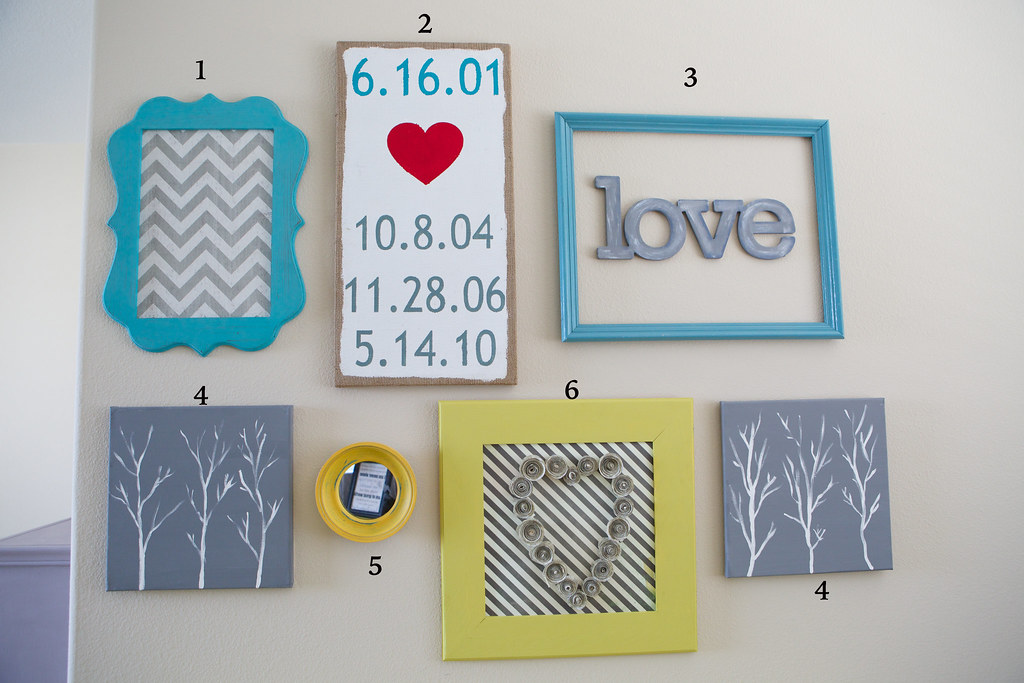
1. I bought this piece at Hobby Lobby with a 50% off coupon.  It would easy to make though as you could just get a frame and a piece of chevron construction paper.

2. The Important Date Wall decor is done on a burlap frame- the step by step instructions can be found here.

3. The Love words- I really wanted the word read, but never could find one at any local store, so I purchased the love word at Hobby Lobby.
KG4A9868
The "love" word is one connected piece, about 1/2" thick and 15" long and 8" tall.  I painted the word gray, then dry brushed it a blue/gray along the edges and then dry brushed it with white.

IMG_8826
Ignore my dollar store ghetto placemats
To dry brush, dip your brush in paint then wipe off most of the paint (I just wipe it on a paper plate that I use as my pallet), then just lightly brush where you want the white show, usually along the edges, this this time I just sort or went crazy.
IMG_8829
I bought the frame at a thrift store, it was already painted that color so it was ready to go.  Thrift stores are great places to look for empty frames.

4. Tree Art- For the Tree Art I used two 12X12 canvases (the multi packs are often on sale at Michael's or Joann's.  I painted each canvas gray and then simply started painting the trees with white.  A trick with trees is that the bottom of the branches and bottom of trunk always need to be fatter then the ends, so start at the bottom or on the truck and take the branches out.   You could also use a silhouette to cut out tree forms as a stencil, like I did with the date art, if you do not want to free hand it.

5. Mirror- small mirror purchased at Hobby Lobby

6. Book Page Rose Art Decor- instructions here


Bench Makeover
The final big change in my room was the bench in the reading nook.  Originally we had planned on moving a love seat we had in the room into this space, however once we did the love seat literally took over half of the area.  Instead we brought up a bench that we had downstairs.  It was a nice piece and a solid wood but I just wanted the look to be fully finished, so I painted it the same Annie Sloan Paloma gray as the book case.
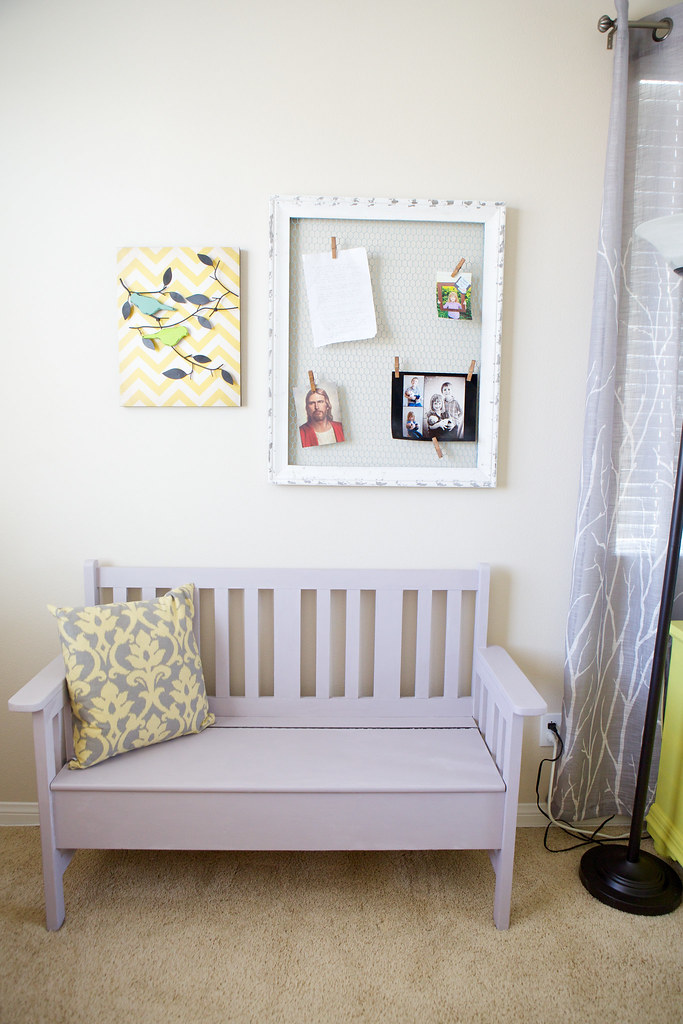
Annie Sloan Paloma Gray

Before I began painting I taped off the seat hinge.  I also taped off along the inside of the lid as I did not plan on painting the inside of the bench.
How to paint wood furniture
KG4A9815

KG4A9816
I did end up taping around the entire inside hinge just to protect it when I was painting the slats.

The hardest part of the bench was getting the side of the seat, due to the slats.  I found it easiest to paint the parts I could see though the slats, then when that was dry, life the seat, exposing the other parts of the side to finish it.
Annie Sloan Paloma Gray

Of all of the pieces I painted, this was by far the most time consuming because of the slats, but I still finished the piece completely in one day. (For tips on painting with chalk paint- see this post)
Chalk Paint
In the end I was very glad I painted the bench as it was the perfect final touch to my master bedroom makeover.
Master bedroom makeover
Have you ever done a big makeover project?  
******************
I am linking this post up at the following crafting blogs
Today's Creative BlogWhip It Up Wednesday Handmade Linky Party

Tuesday, April 1, 2014

Bedroom makeover: Painting Furniture

I am finally getting the next tutorial for my master bedroom makeover. I've already showed you the overall transformation, the bookcase transformation, the important date wall decor, and the book page rose wall art.

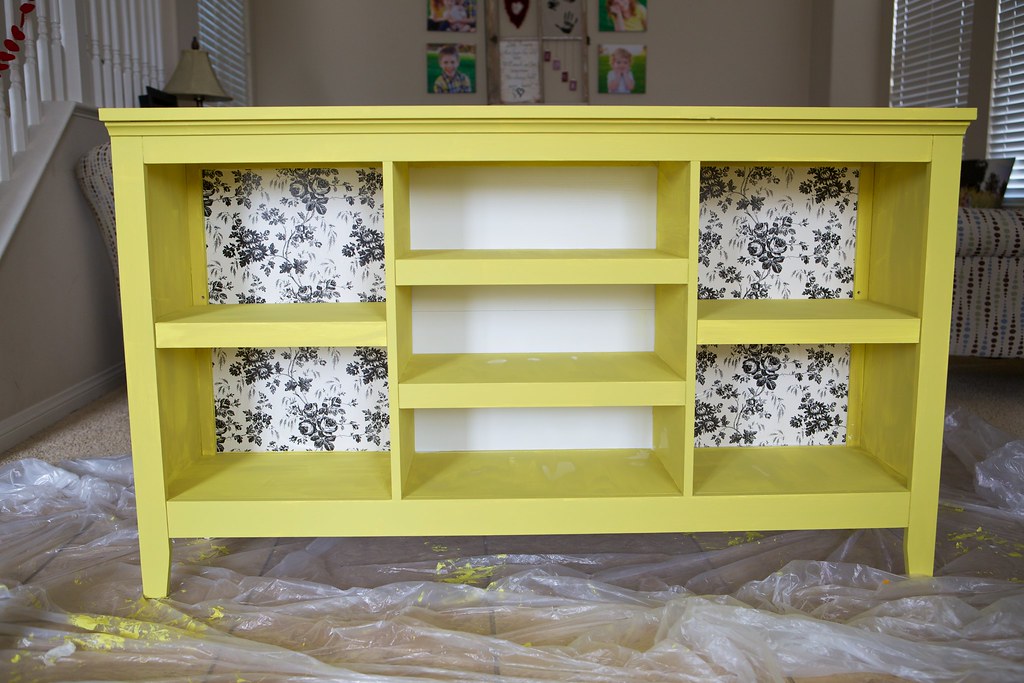
Today I am going to talk about the yellow pieces in my room, the nightstands and the horizontal book case.
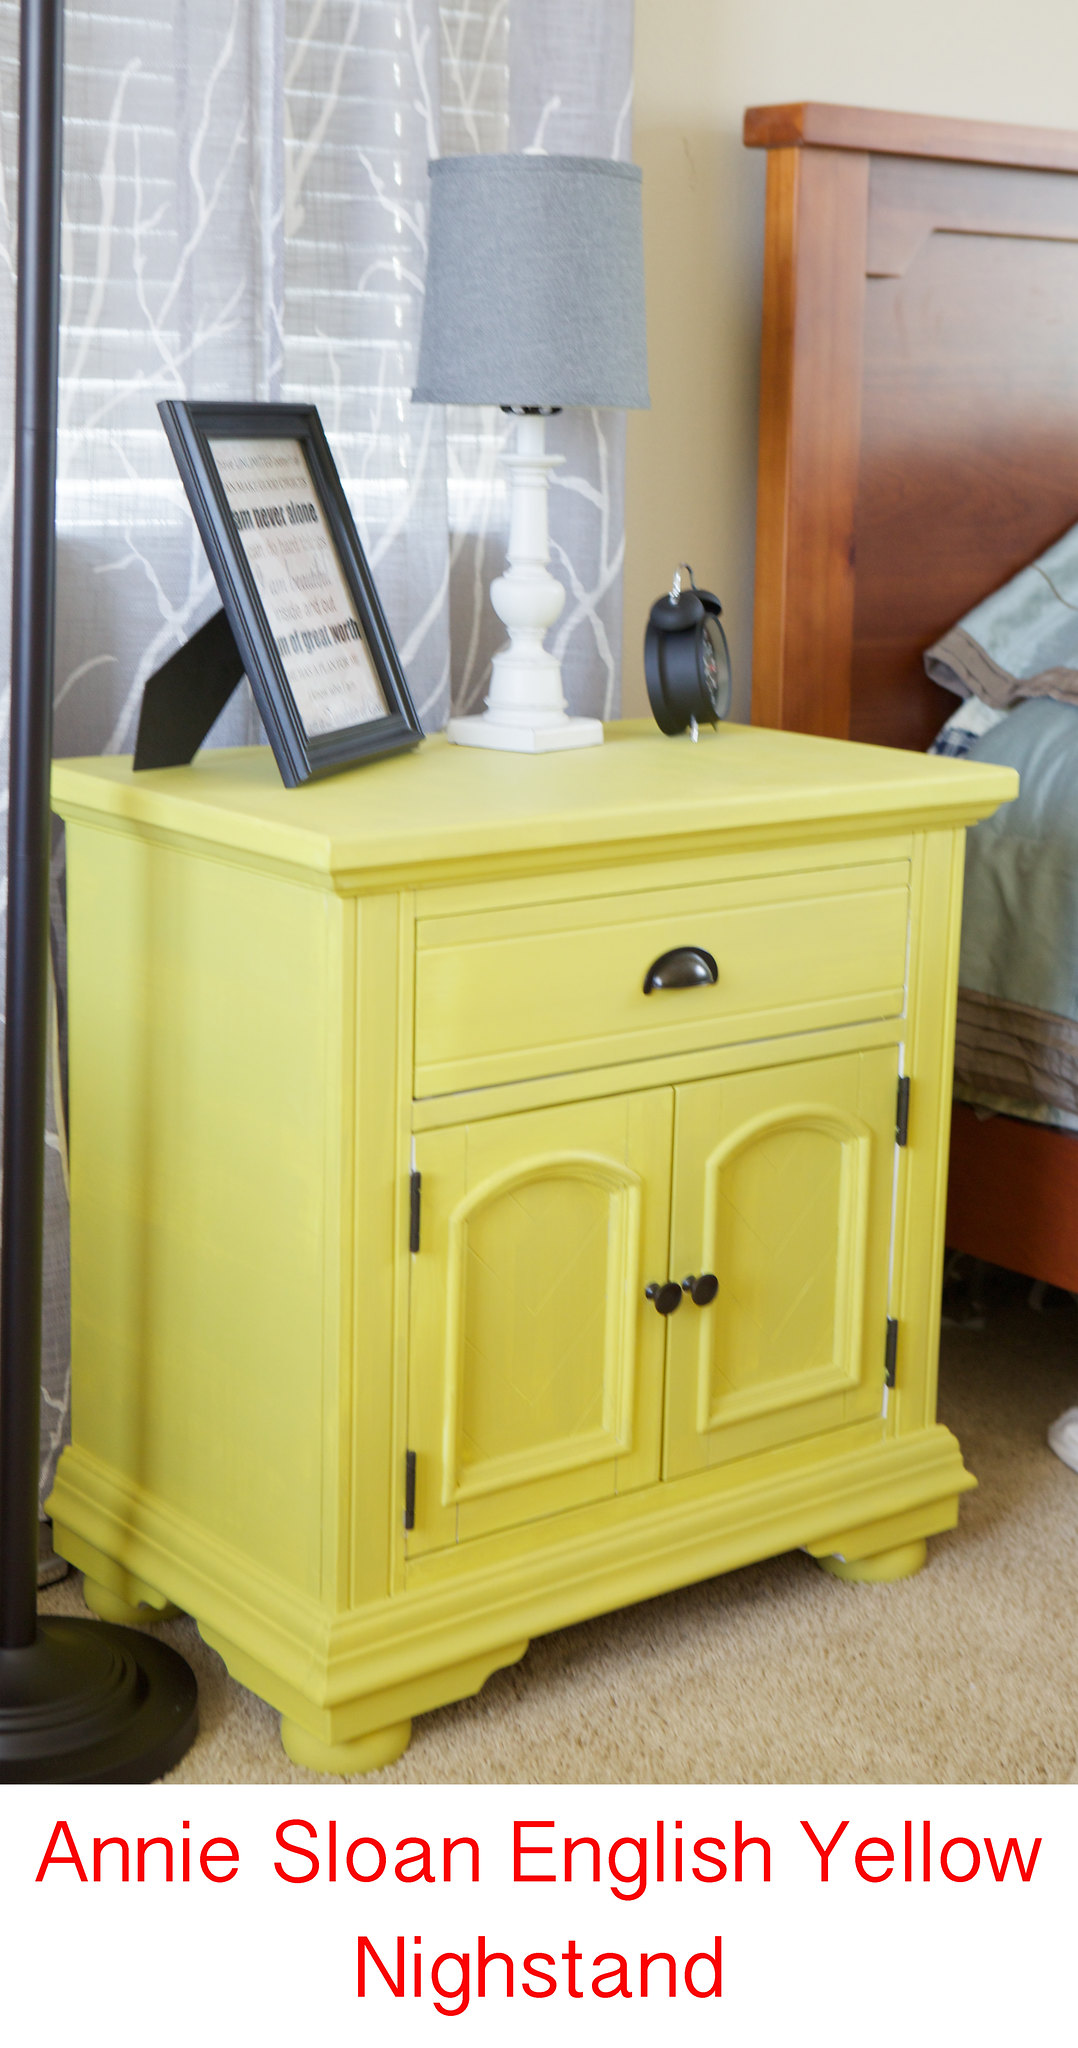
Annie Sloan English Yellow
My master bedroom makeover really began with my nightstands.  We had two mismatched nightstands that were dated and didn't match a thing.  While shopping I saw some tables in a great yellow color and knew that was the pop color I wanted, unfortunately I could never find any nightstands in the color I wanted that didn't cost way too much money.

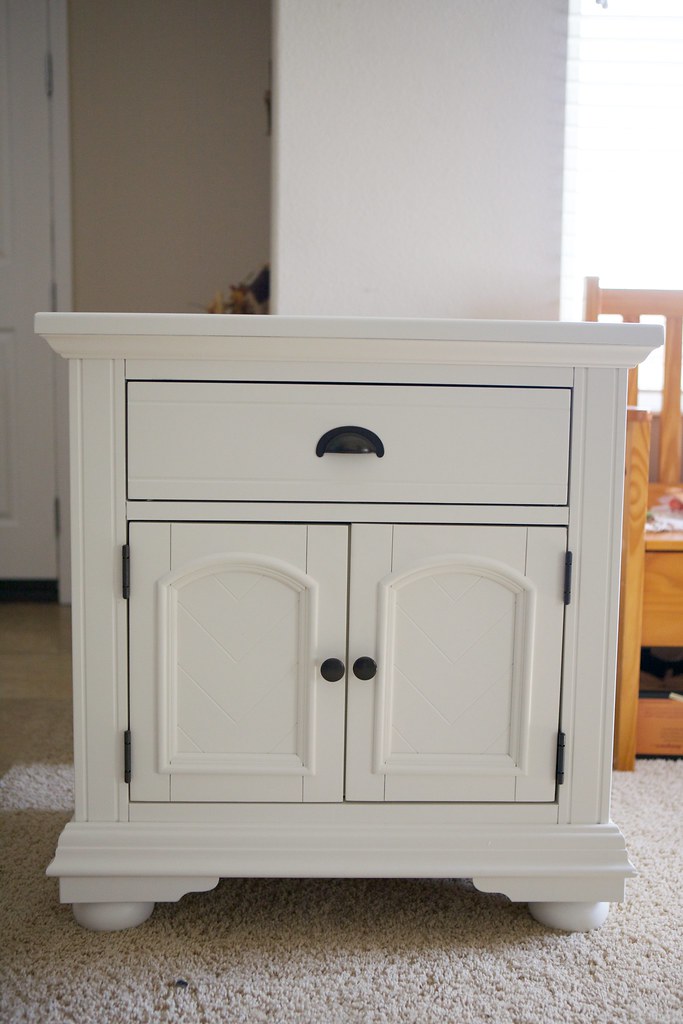
For Christmas, my mother-in-law purchased these great nightstands that I loved, taller height, a drawer and a place to put things out of sight. They are the Napa White Nightstands found here on Overstock,  now all they needed was some fun color.
Nightstand
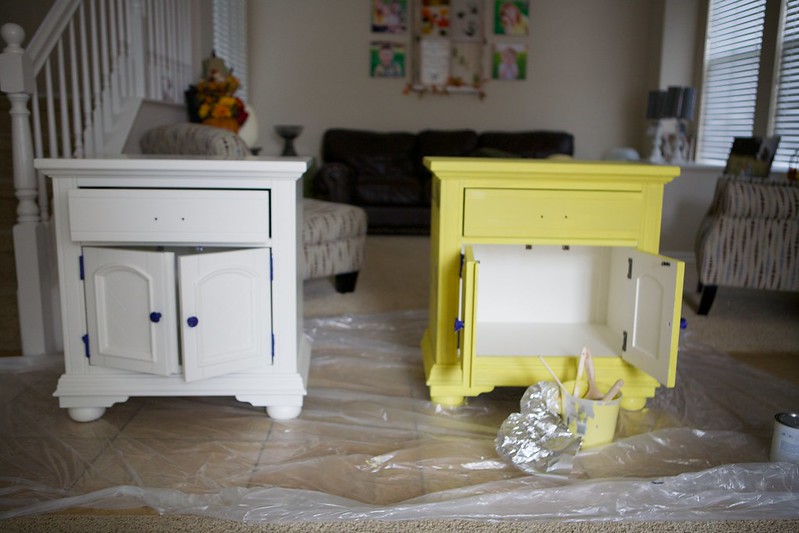
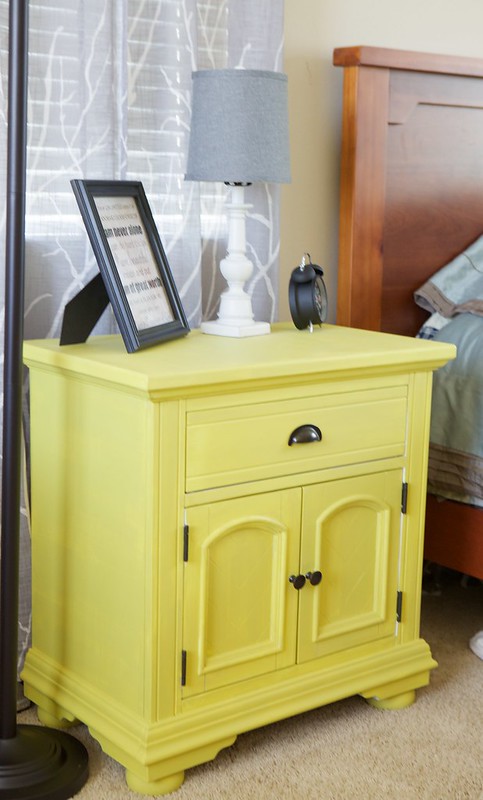
I removed the handle from the drawer and taped up the hinges and the rest of the handles then began painting.  I used Annie Sloan English Yellow. I did not paint the inside of the nightstands.  I used two coats and then finished with the clear wax.
yellow nightstand
For tips on painting with Annie Sloan paint- see this post here.

I love the finished look and the great color that it adds to the room.
Painting a nightstand

Horizontal Book Case
horizontal bookcase
Since my first book case was now more display, I needed a place for my books.

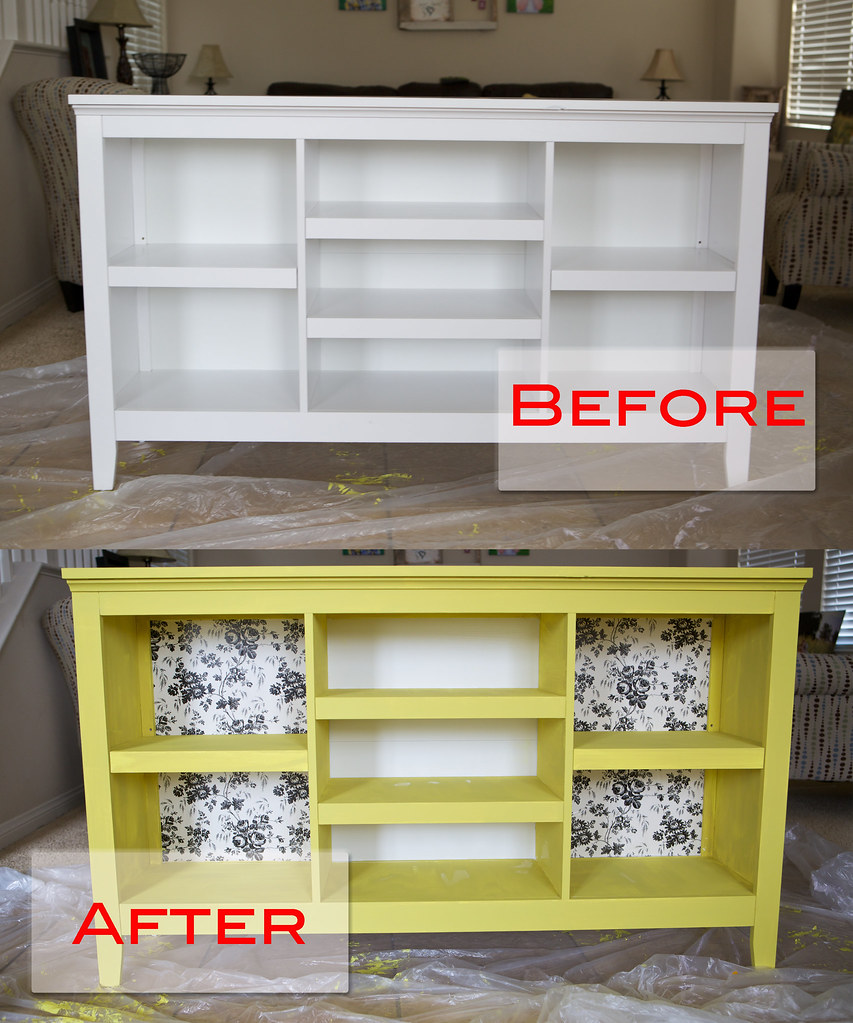
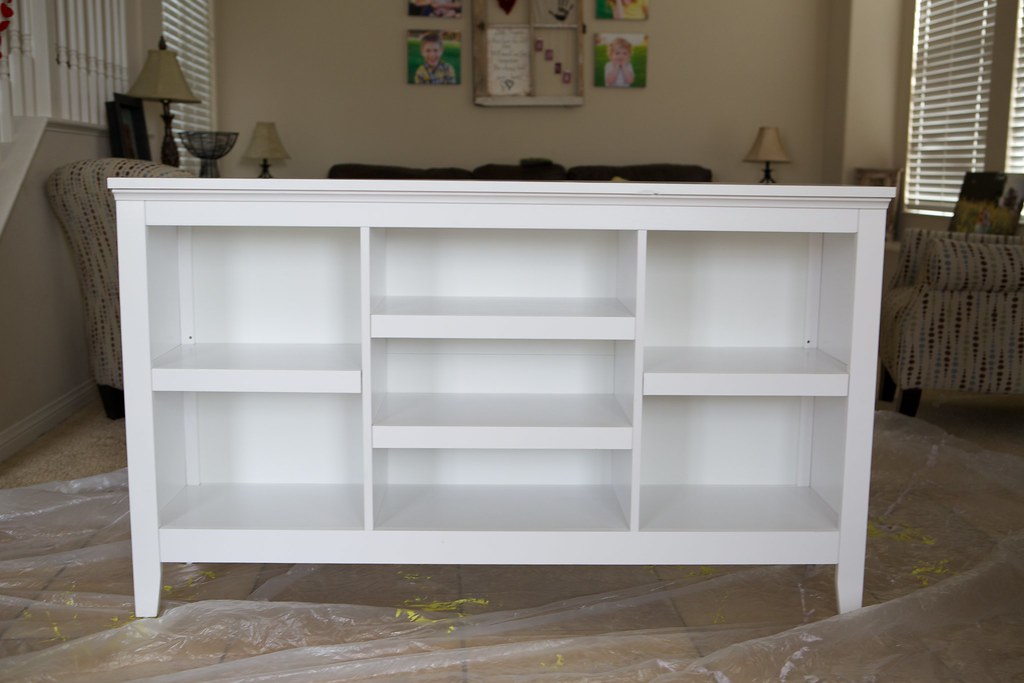
I wanted a long horizontal book case for my reading nook and found this piece at Target.
white bookcase
It comes in several colors, but I got it in the white as I knew I would be painting it the same color as the nightstands and wanted the finished color to come out the same, so I picked furniture with the same base color.

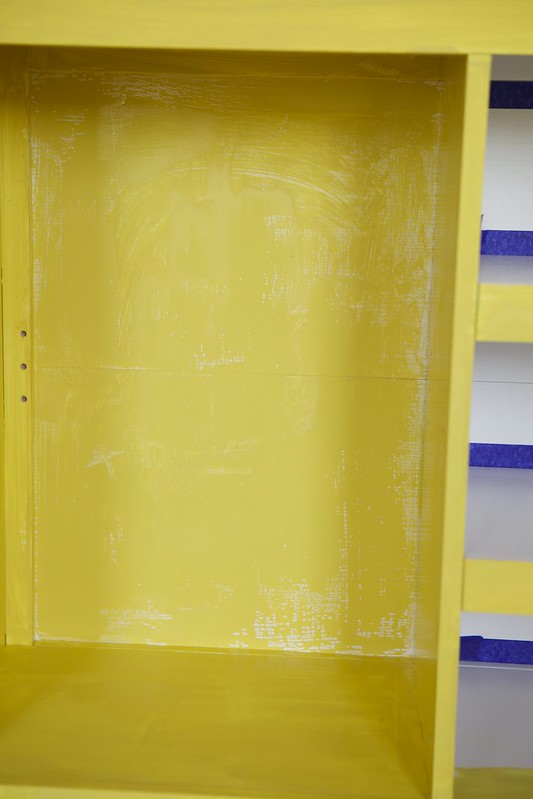
Now Annie Sloan paint is wonderful and you can paint on just about any surface, but it isn't perfect.

The back of this piece is one of those folded cardboard like pieces that you just nail onto the back, it had a very smooth and almost shiny finish and when I began painting it, it started bubbling up.   Even after painting it several times, the paint had holes, steaks and bubbles.
KG4A9782

Since I had already tried to paint one part, I couldn't just leave it white.  I then decided to finish the big back sides with contact paper.

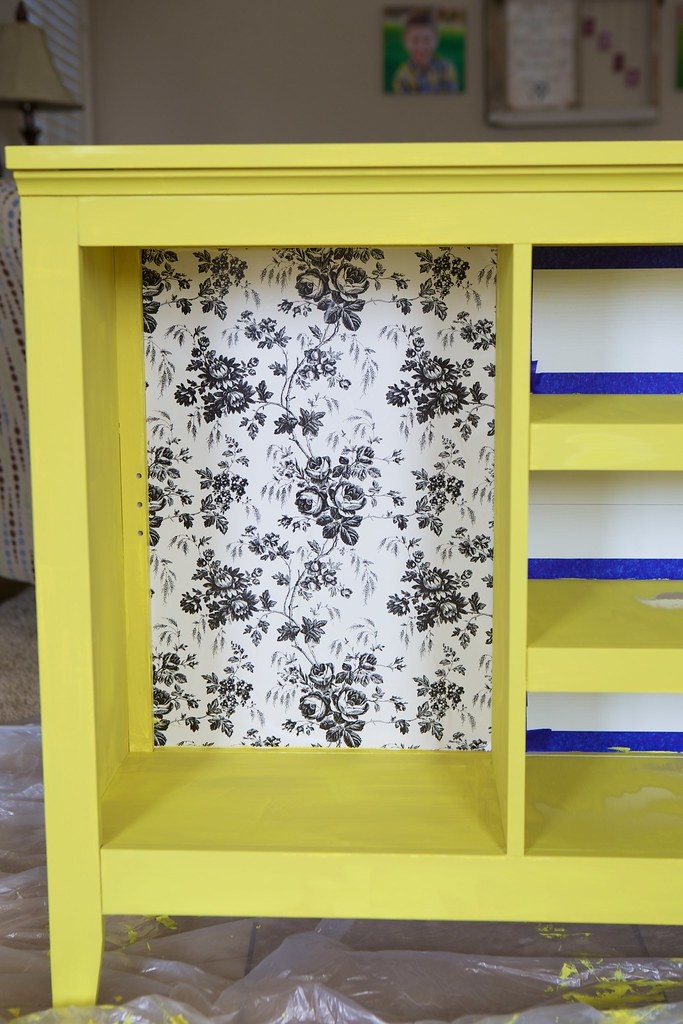
I took out the shelves and measured the space.  The contact paper I used was a roll from the dollar store, I began at the top and then slowly peeled off the protective backing and smoothed down the piece.  It stuck wonderfully and I loved it and was as much easier process then the wrapping paper I used for the gray bookshelf.
redoing a bookcase
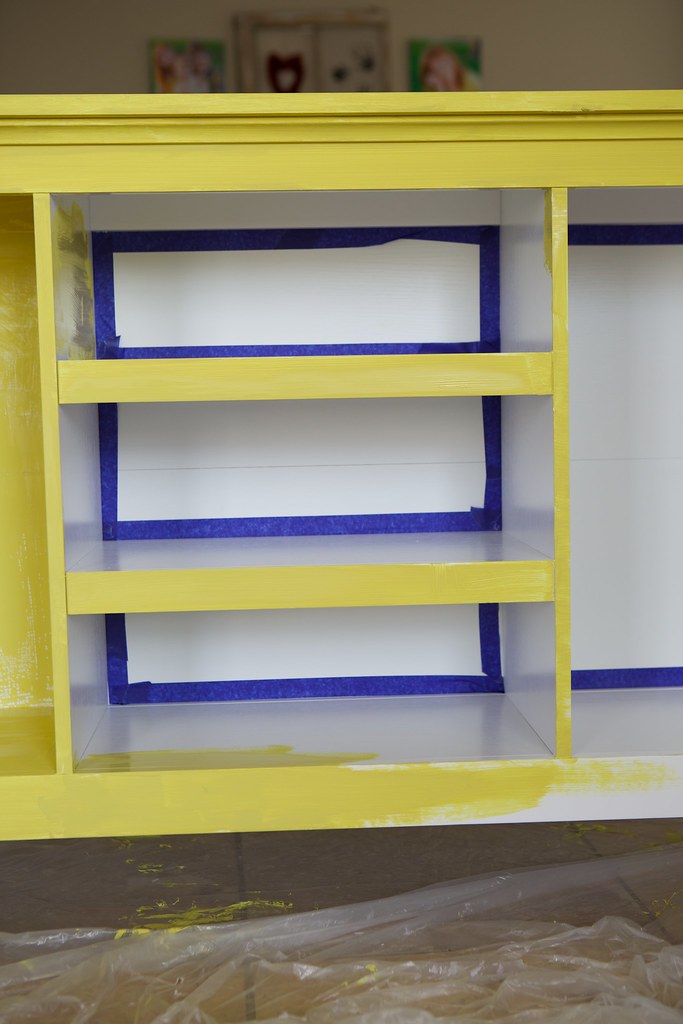
I did make sure to tape around the edges of the inside shelves as I did paint the insides but left the back white.
taping furniture while painting

I absolutely loved how the black flowers looked compared to yellow.
KG4A9787
There are a few shiny spots as the paint wasn't fully dry, I get  overly excited when I finish a project
The final look
While the flower paper doesn't really show, it was added more out of necessity after realizing the paint wasn't adhering correctly, but someday if I wanted to change things around it has a beautiful background all ready to go.

To see the rest of my master bedroom makeover- click here. I will continue to add the tutorial links to that original post. 

Do you keep books you have already read or do you get rid of them?

*************************
I am linking this post up at the following crafting blogs

Today's Creative BlogWhip It Up Wednesday Handmade Linky Party

Tuesday, March 11, 2014

DIY Book Page Rose Wall Decor

For the next tutorial from my master bedroom makeover, I thought I would show you the Book Page Rose Wall Decor.  To see the rest of my bedroom makeover, click here.
DIY Book Rose Wall Decor
Supplies:
 Picture Frame 12X12 Opening
 Scrapbook paper
 Old Book
 Scissors
 Pencil
 Glue
 Paint (for frame if needed)

For this project I used a plain wooden glass-less frame, I believe I picked it up at Hobby Lobby, but it is something I bought a while ago and has been just sitting in my craft cupboard.
IMG_8794

I found a piece of 12X12 scrapbook paper I liked, and placed the paper in the frame.
IMG_8787

Book Page Roses
  To make the book page roses find a book you are wiling to tear the pages out of, a thrift store is a great place to look.  I love books with older yellowed pages with a thin paper.
IMG_8788
I found an old dictionary that had pages similar to what you would find in a bible, it was perfect.
How to make a paper rose
Many of the book rose tutorials say to cut your page into a square, but I just draw a my circle in a squarish shape, one less step that way.
IMG_8790
Draw the spiral starting in the inside and continue out.  I drew my lines lightly with a pencil.

I drew the spiral on one page and then stacked THREE pages together before cutting to give the rose more depth.

Then it is time to cut.  When you cut, I definitely recommend having a surface for your rose to fall back on as you cut it, so it doesn't get all twisted up.
IMG_8791
Tips on how to make a paper rose
Start on the outside of the circle cutting in, make sure to leave a circle piece at the very end (the middle), as this is what your flower will rest on.

Then start from the OUTSIDE of the spiral and begin rolling up each loop inward.  You will want to begin by rolling it tight as this is the center of your flower, then as you move inward, you can begin letting it loosen a bit.
How to make a Book Page Rose

As you get to the end, glue your rolled up flower on the center circle piece.  I just used regular Elmer's Glue and it worked great.  I put a big glob on the flat circle part and pushed carefully down.

I lay the roses carefully upside down to dry.  I ended up making 18 roses.  Once they were fully dry, I placed them on the paper in the heart shape, then I picked the roses one at a time and glued into place; I once again used Elmer's glue.

After the heart was glued into place, I took the whole paper out of the frame and painted the frame the Annie Sloan English Yellow, though any kind of paint could have worked on this frame, I wanted it to match the furniture I was redoing).

Resulting in a piece I love.
How to Make Book Page Roses
While it was easy to make the roses, it was definitely time consuming, I have no idea how people make an entire wreath full of these!  
Have you done a project or craft recently that you love? 
*********************
I am linking this post up at the following crafting blogs
Today's Creative BlogWhip It Up Wednesday Handmade Linky Party

ShareThis